Advice and answers from the Digital Joy Team
- What is Digital Joy?
- What products do we offer?
- Can I try Digital Joy products for free?
- How do I contact support?
- How can I cancel my account?
- Can I get refund after cancelling my account?
- Where can I get more information regarding Digital Joy Privacy Policy?
- Do you have discounts for non-profit organizations
- Account
- Subscription
- What countries does Digital Joy support?
- Can I try Digital Joy Engage before I buy it?
- How to set up my account in Digital Joy? (Quick overview)
- What is a response?
- What does the number of responses indicate?
- How many responses/votes do I get as part of the Free plan?
- Do you count duplicate votes as responses?
- Polling Fundamentals
- How do I create a poll in Digital Joy Engage?
- How many polls can I create while my plan is active?
- What kind of questions can I create with Digital Joy Engage?
- What is an active poll?
- What purpose does the “Activate” button serve on the Polls page?
- Can two polls be active at the same time?
- How do I delete a poll?
- How do I add more questions or polls?
- Can I create polls without launching them?
- How can I display/share the results of my poll?
- Can I edit my poll after creating it?
- Can I schedule a poll?
- How do I reschedule a poll?
- Do you support word clouds?
- How can I enable only one medium of voting?
- How do I clear poll results?
- Types of embed scripts and how to use them
- What happens on the web polling widget when I don’t have any active polls?
- Can I copy an existing poll?
- How do I switch between my polls on the Present screen?
- How fast do votes show up?
- Can I create a poll with more than two options?
- How will my audience know how to vote?
- How do I reset a poll?
- Can I create a survey/quiz?
- How to choose a WEB polling template and a background
- How can I moderate questions and comments for open-ended entries?
- How do I create an open-ended question?
- How do I create a word cloud?
- Can I have more than one question active at a time?
- What are the word cloud settings available to me?
- How do I introduce Digital Joy Engage to my audience?
- Poll Wizard – Can I create a poll with more than two options?
- What languages does Digital Joy support?
- Can I export and download the results of my poll from the dashboard?
- How long will the event code be available for my account?
- Polling Settings
- Voting
- How can I enable multiple channels of voting?
- How do I share my poll with my audience?
- What is an event code?
- How do I embed a poll into a web page?
- How do participants join my event?
- Can my users respond to the same question multiple times?
- How do people vote, respond, or otherwise send in comments or questions?
- How do I vote online?
- Do you support online (web) polling?
- Which internet browsers do you recommend the most?
- Should I present using Chrome or as an embed within my PowerPoint slides?
- Can I restrict my voters?
- SMS VOTING
- Do you support SMS voting?
- Will the SMS number be dedicated for my event?
- What happens if there is a typo in a text message?
- Which country phone numbers do you support?
- How should my audience text-in to vote?
- Can I change the phone number of my account after registration?
- SMS voting isn’t working. What is happening?
- Will the phone number I have be shared with anyone else?
- I cannot find my phone number
- Will my participants ever receive spam or unwanted text messages after they vote?
- What countries does Digital Joy support for text polling?
- Polling Results
- Can I analyze the polling report in Excel?
- What analytics are available for my questions in the dashboard?
- How to hide/show the live results of the poll in the polling widget?
- What will exported data look like?
- How do I display questions?
- How do I add Digital Joy Engage to my PowerPoint slides?
- How can I zoom in within the Presentation Mode?
- What is the Presentation Page for?
- How do I change the theme of the Presentation Mode?
- Can I add a logo on the presentation display header?
- How to make the Presentation Mode full-screen?
- Is Digital Joy integrated with Keynote?
- Audience Q&A
- Poll Groups
- What is a Poll Group?
- How can I create an engagement using the Poll Groups?
- Can I create a contest poll using poll groups?
- Can I attach a website link with my Poll Groups question?
- What kind of login authentication can I use with my Poll Groups?
- How can someone access my Poll Groups?
- Can I add an opt-in checkbox on the login/registration page?
- Can I create a quiz or trivia complete with a leaderboard?
- Getting Started
- What is Digital Joy Chat?
- How many users can my chatroom hold?
- How can I use Digital Joy Chat?
- Setting up your Digital Joy Chat account
- The Digital Joy Chat admin dashboard
- How do I create a chat channel?
- Can I customize the look of my online chat?
- How can I add & update my chat users?
- Does Digital Joy Chat support images in live group chats?
- Can I embed Digital Joy Chat into my website?
- Can I make my chat private?
- How can I view and share my chat page?
- How can I navigate the chat page?
- How can I moderate my chat?
- Digital Joy Chat Widget
- How can I view & share my chat page?
- Getting Started
General
General product information
At Digital Joy, we are committed to helping you tell your story and engage with your audiences. Our product suite is a comprehensive solution that empowers you to create compelling content from start to finish. Whether it’s creating content to go to digital platforms, engaging audiences or creating an interactive experience at a virtual event, Digital Joy is there to meet your needs.
With our end-to-end ingest-to-distribution turnkey content creation solution, you have everything you need to Excite, Engage, and Ignite your audience. Our platform comprises features such as Live and OTT content creation, live engagement, Q&As, live chat, word clouds and events, making it the ultimate storyteller’s toolkit.
Our platform is not just limited to one industry, as it can be used across various fields, including media, entertainment, medical, pharmaceuticals, education, churches, NGOs, and nonprofits, among others. At Digital Joy, we are dedicated to helping you tell your story and connect with your audience in a way that is both engaging and memorable.
Learn more about our products
Digital Joy provides cloud native products to create content, inspire and engage audiences. For teams small to large, Digital Joy delivers powerful, intuitive, easy to use, end-to-end solutions utilizing the latest technologies.
Digital Joy Engage
Digital Joy Engage provides truly live results that update on the presentation screen in real-time. Present your poll results live within Digital Joy’s Engage dashboard or by using our Microsoft PowerPoint integration.
Engaging your audience in your story is effortless with truly interactive real-time audience polling quizzes, trivia, and more. Inform, Engage and Entertain your audience.
With instant audience responses, you can add a personal touch to your presentation and easily navigate questions or concerns as they come up.
Digital Joy Chat
Introducing the ultimate online chat interface. Boost audience engagement and enrich the user experience with the group and direct online group chat capabilities.
A new standard in online user engagement is now available for your business or organization! Boost audience engagement and enrich the user experience with the group and direct online group chat capabilities.
No matter who you want to connect and share with, Digital Joy Chat is the quick and easy-to-use online chat tool you need to do it!
Digital Joy Events
Digital Joy Events is a virtual event platform that allows you to create custom branded virtual events with tools and features to engage and ignite your audience.
All of your virtual event needs are taken care of! You’ll have a smooth and successful event, from getting your event up and running to ensuring you have all the tools to engage your audience. Digital Joy covers it all for you
Digital Joy Live (coming soon)
Your video broadcasts can be more seamless than ever before with live streaming tools that help you access your content live from anywhere so you can collaborate globally and stream instantaneously.
Cloud – Based Production, Editing and Distribution for Live Videos designed and created for small teams.
Digital Joy Studio (coming soon)
Digital Joy Studio is a content creator’s dream come true. A cloud-based turnkey video production and distribution platform empowering customers with the tools to ingest, manage and edit live and on-demand broadcast-quality content for multi-platform over-the-top (OTT) destinations, including social media, Connected TV (CTV), mobile apps, and websites.
Learn how to try Digital Joy for free
Digital Joy features a Free plan which can be used to try all of the features completely for free.
The Digital Joy Engage free plan includes 150 responses making it a good fit for anyone looking to explore and try the functionality.
Note: the free plan is valid for 30 days. If you need more than 150 responses in Digital Joy Engage but the next higher package is too large for you, please feel free to contact us and we will try to help.
Click here to sign up for the Digital Joy Engage free plan
Contact Digital Joy support for assistance
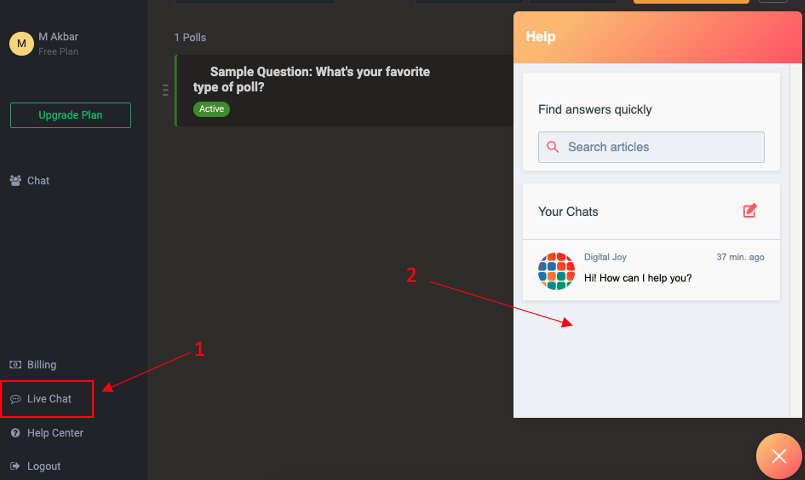
Our support team can be contacted either through email (support@digitaljoy.media) or using the chat feature which can be found by clicking the Live Chat option in the product dashboard
Learn what to do if you want to cancel your account with Digital Joy
You can request the cancellation of your account by clicking here or contacting us in live chat. We would need your email address (username) to find and delete your account.
Account cancellation does not involve any refunds. Any unused responses will be lost upon cancellation.
For details on our refund policy, please refer to Section 13.2 (Refund Policy) on our Terms & Conditions page.
Learn about the Digital Joy Privacy Policy to make sure you are secure.
If you cannot find answers to your questions about our Privacy Policy, reach out to us at hello@digtaljoy.media.
Learn about the pricing options for non-profits
Click here for more information
Please be aware that you might be asked to submit your work email address as part of our internal verification procedure.
If you are an agency or a contractor for a non-profit organization, please contact us for details on how to proceed.
Account
Learn how to register an account with us
- To create an account go to digitaljoy.com and click “SIGNUP”.
- You can also sign up by visiting the link Digital Joy Engage
- You will be taken to the registration page.
- To register with Digital Joy, you need to provide a full name, a valid email address, and a strong password.
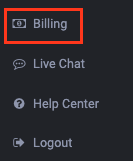
- If you decided to subscribe for a paid plan, simply click on the Billing option after logging in and choose your preferred plan:
You can not change the email address of your account after registration.
However, if, for some reason, you need to replace it with a different email address, please contact us at support@digitaljoy.media
Learn how to reset or change your password in case you lost or forgot it.
If you have lost your password you can reset it by clicking the “Forgot password?” link on the login page and following the instructions.
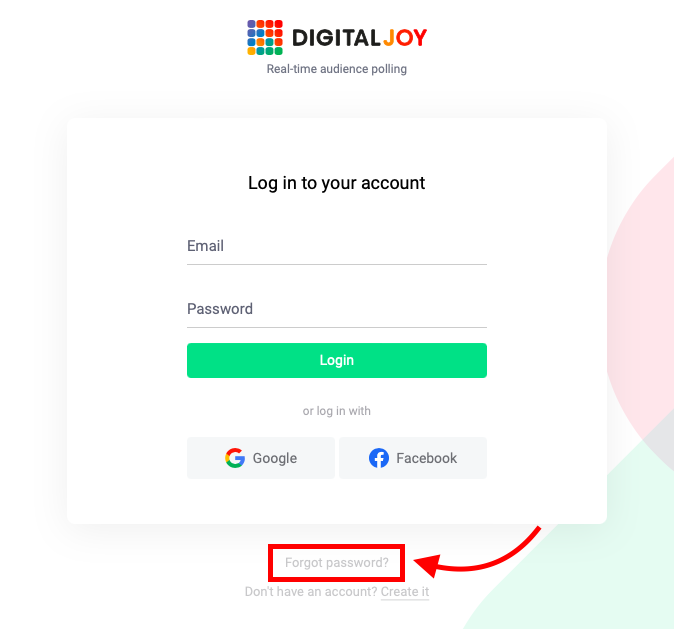
When you click “Forgot password?” you will be redirected to a page asking for your email address. When you type it, Digital Joy will send you an email with a password reset link. Follow that link to set a new password for your account.
Subscription
Learn how much time you have to use the responses you purchased as part of a plan
When the 30 days pass and you do not upgrade before the expiry date, three things happen:
The phone number of your account is released and may be available for newly created accounts, and you can not use the SMS feature.
Any responses not spent by the expiration time are canceled and no longer available.
To prevent this from happening, please, make sure to upgrade before your free account (plan) expires.
For annual plans, your responses and phone number will remain valid for a year.
Yes, You will receive an email from us immediately after you purchase a plan. Please ensure that the email is accurate (please check your spam folder if it is not in your inbox).
If you have any issues or if you didn’t receive a copy, please contact our support in live chat or via email at support@digitaljoy.media.
Subscribe to a paid plan to access more features
1. Click Upgrade Plan
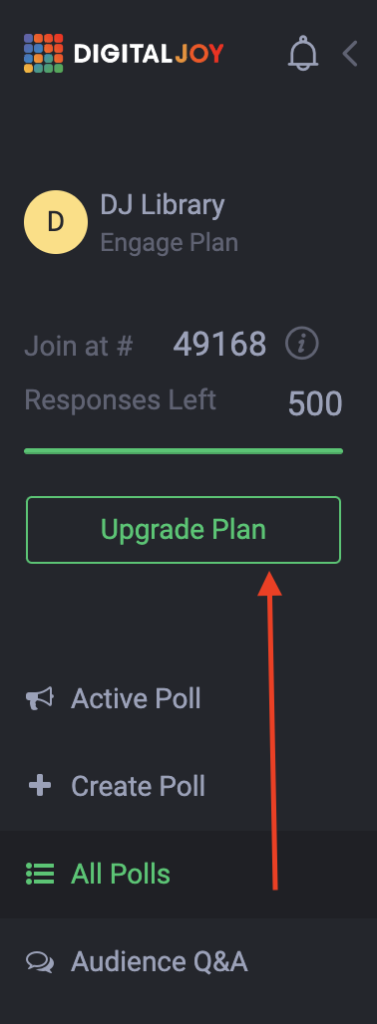
OR “Change plan” in the Billing section
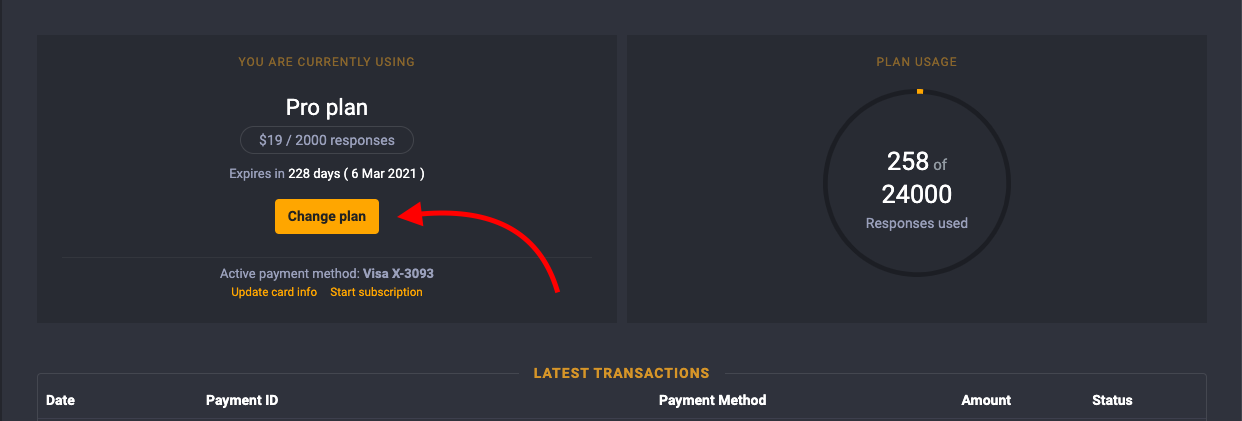
2. Choose a plan then click Upgrade
3. Enter your credit card info –> Update Card Info


Important – When you upgrade from the Free plan to a paid plan, the number of responses of your account will be rounded up to the number of the responses in the new plan.
Have further questions? Click here for more information
Learn what happens when the responses you get as part of your plan end
If your account runs out of responses, Digital Joy will stop counting any new votes for your active engagement. Unfortunately, any responses submitted by your audience while your response count is at 0 will not be recorded and will be lost.
To check how many responses you have left, simply go to your billing section and look under “Plan Usage.” There, you’ll find the current status of your responses.
If you need more responses, consider upgrading your Digital Joy subscription plan. Upgrading will provide additional responses and other benefits depending on the plan you choose.
You can find detailed information about the different plans we offer, along with everything included in each subscription, by visiting this page. It’s the perfect place to explore your options and discover what comes with your current plan or any of our other available options.
Additionally, each plan includes a set number of responses. The number of responses indicates how many votes or responses you can receive with your plan. Once someone responds to your question, that counts as a response and is deducted from your account’s response limit.
Digital Joy Engage
Digital Joy online (web) voting can be used anywhere in the world without any limitations.
For SMS voting/text to vote we currently support:
- United States
- Canada
- United Kingdom
We support other countries on demand, please submit a request.
Please contact our support team (support@digitaljoy.media) if you would have any questions.
You can try our web voting for live events for free and see the results for your audience updated in real-time by signing up for the “Free” plan which comes with 150 responses available for 30 days.
-
Start off by signing up for Digital Joy.
-
Before you purchase a plan, you will be given 150 free responses to test the product.
-
Create a new poll.
-
Test web voting.
-
Present the results by clicking “Present“.
-
Once you are sure Digital Joy has all you are looking for, choose a plan.
-
Click “Upgrade Now” to purchase a plan.
-
Set up all the polls for your event in advance and reorder them in the “Polls” section.
-
On the day of the event, track your responses with our dashboard tracker.
-
Use the live chat button to ask us any questions at any point.
A response is any text message or web submission that your Digital Joy account receives from your audience.
We wanted to simplify the process and instead of creating plans that would depend on the size of your audience we have plans that depend on how many responses you would expect in general. This way if you plan to ask fewer questions you can have a much larger audience at a much lower price.
Here is how to calculate the right plan for you:
1. Estimate how many people are attending your event.
2. Estimate how many questions you will be asking.
3. Decide if you need this for a one-time event or for a longer period of time.
4. Multiply the number of questions by the size of your anticipated audience (and by the number of times you will be using the product).
For example, we are hosting an all-hands meeting at our nonprofit with 100 people attending and we plan to ask 10 questions.
1. Number of attendees: 100
2. Number of questions: 10
3. Number of usage times: 1
3. 10x100x1 = 1000 responses required
The number of responses indicates how many votes/responses you can receive with each plan.
Once someone responds to your question, that is considered a response and is counted towards your account’s response limit.
You will receive 150 responses/votes. The responses will be valid for 30 days.
With the Free plan, you get some of the features of larger accounts, so you can get a real feel of how Digital Joy Engage can help you facilitate and engage your audiences.
Please check the pricing page for more details/updates.
Yes, any response that comes in (and received by Digital Joy) is counted as a vote/ response.
However, if your poll voting limit is set to 1, repetitive votes from the same phone number will not be counted as a response. Only the first vote is counted towards your account’s response limit.
Polling Fundamentals
Learn how to use the Poll Wizard to easily create your poll
Need some help getting started to create your first poll? Follow the step-by-step video tutorial below to familiarize yourself with the Digital Joy Engage Poll Wizard.
- To start, click on the Create Poll button

- Next choose the type of poll that you want to create

- The character limit for open ended and word cloud question type answers are as following:
- Open Ended Poll – 300
- Word Cloud Poll – 25
- Then select the voting methods

- Click ‘Next: Polling Data’ to start filling in your poll data

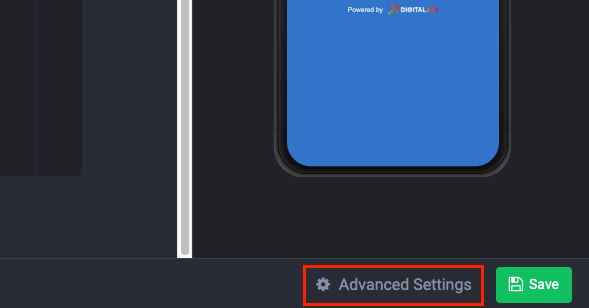
- Click the Advanced Settings to configure the following:
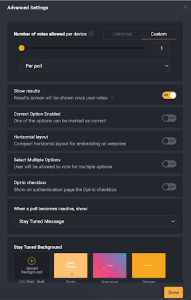
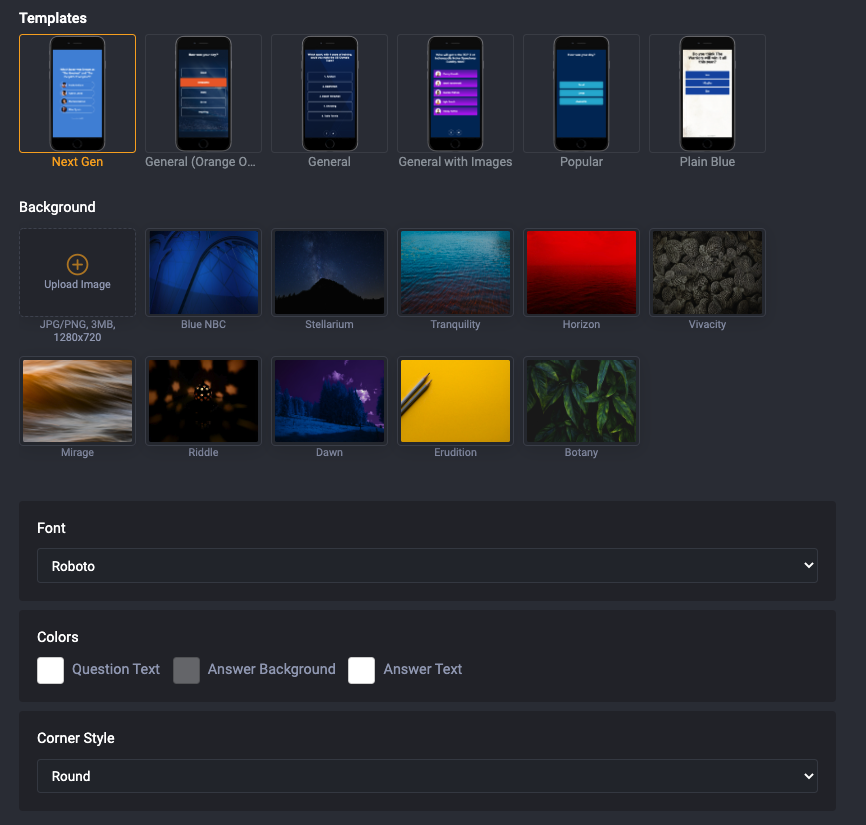
- Click Next to go to the Visual Settings to configure the following:
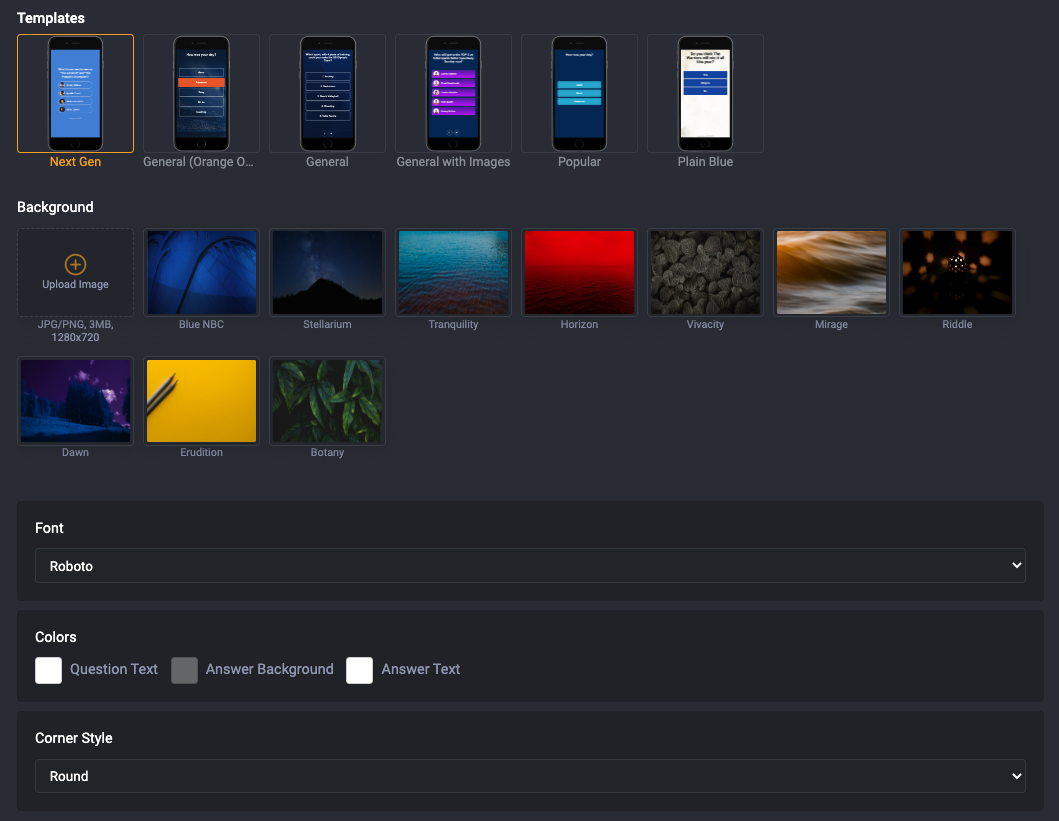
- Template – how your poll question will look like.
- Background – add background to your poll.
- Font type – select font for your poll.
- Colors – choose colors for:
- Question Text
- Answer Background*
- Answer Text*
- Corner style* – Choose the option button’s corner style
- The Template Preview panel automatically updates every time changes are made to the poll
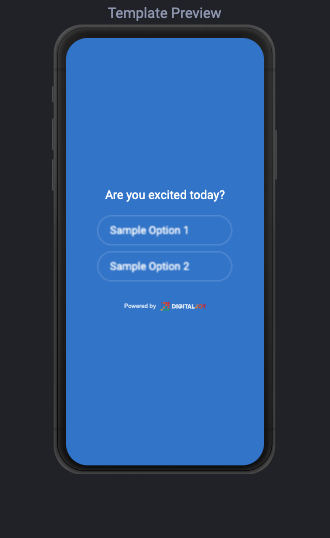
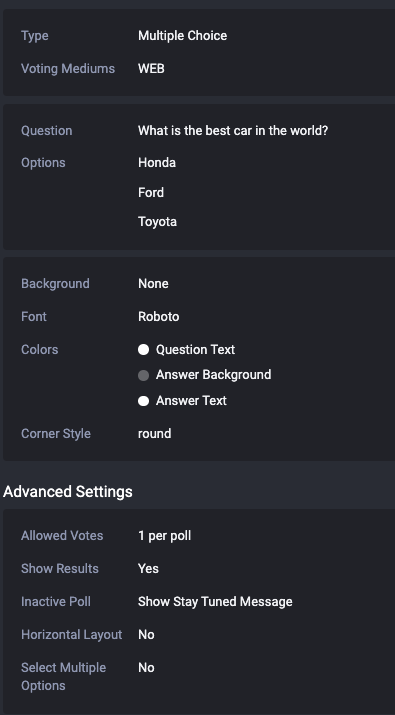
- Click ‘Next: Preview & Launch’ to preview your poll details

- Once all is ready, click ‘Create & Go Live’ to activate your poll

- Alternatively you can also either choose to just Create your poll without launching it, or
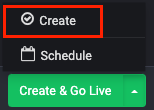
- Schedule your poll to start at a later time & date
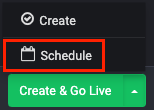
- Alternatively you can also either choose to just Create your poll without launching it, or
Note: Settings mark with asterisk (*) symbol are only applicable to multiple choice poll type
There is no limit as to how many questions you can create. You are only bound by the number of votes/responses you have. You can create as many polls as you like given that you have enough responses for your audience to be able to vote, as long as your plan is active.
Different plans are active for different periods of time. We also offer one-time plan subscription model tailored to customers seeking a non-recurring commitment. With this plan, customers can access a set number of responses (X amount) within a specified timeframe. Unlike traditional subscriptions, our one-time plan does not renew automatically, providing flexibility for customers who prefer a single, time-limited engagement. Responses included in the plan are valid for a predetermined duration, ensuring users make the most of their subscription while it’s active. This approach allows customers to engage with our service on their terms, without the pressure of a recurring commitment, while still benefiting from a defined quota of responses within a set timeframe.
Learn about the tools that Digital Joy provides
With Digital Joy Engage you can create:
- Multiple-choice polls
- Open-ended questions
- Word cloud polls

Multiple-choice polls
Best when you have a predefined set of response options and you want participants to choose from the list.
WEB polls allow your audience to access a web polling widget by visiting digitaljoyengage.com and typing your event code.
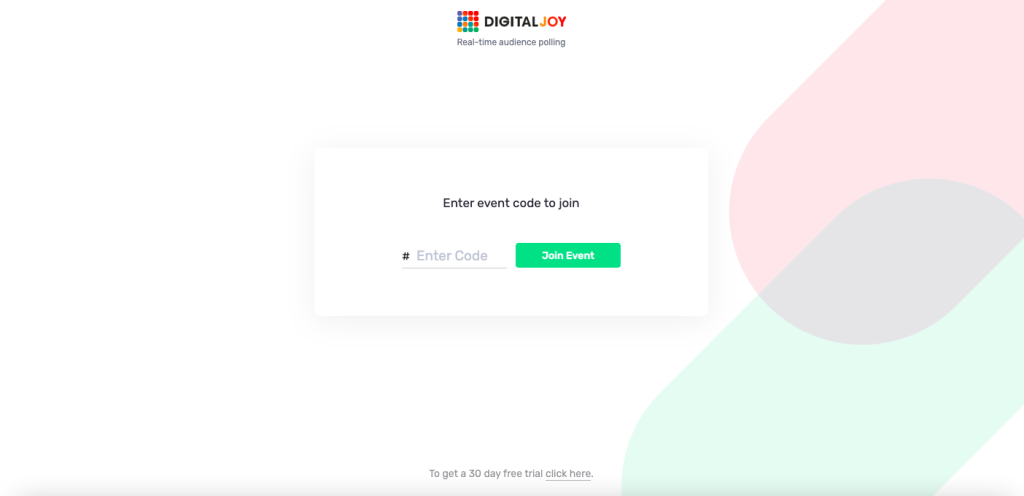
They will then see the question and the options and will be able to vote by tapping on one of the options. After voting, the user will be shown the poll results updated in real-time.
An example of a WEB widget:
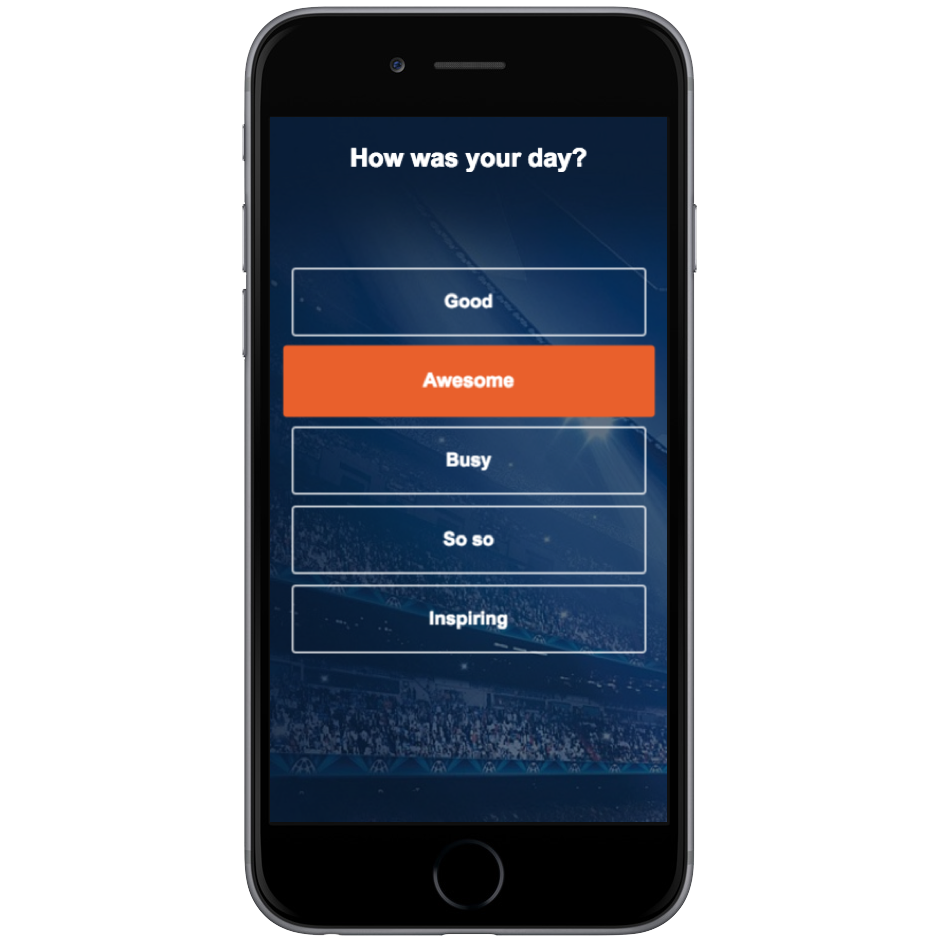
An example of an SMS vote
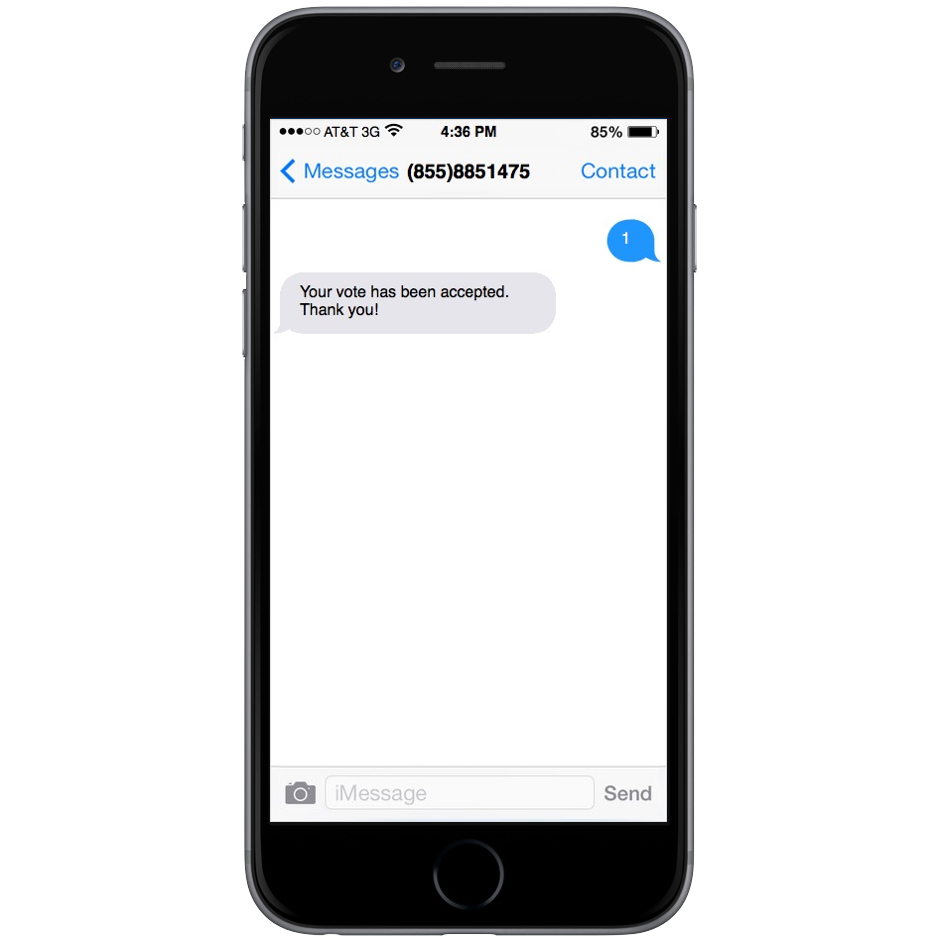
You can also create surveys with Digital Joy.
Open-ended questions
This is best when you want participants to provide feedback, share ideas and opinions, and ask questions. It’s also used for competitions, nominations, etc.
An open-ended question does not have predefined options, and the audience can send whatever they want in a text message or on the web.
To respond, they simply need to send a text to your account’s phone number or respond on the web by typing the event code on digitaljoyengage.com
The presenter will see all of the responses in a list in their account, as well as in the presentation mode.
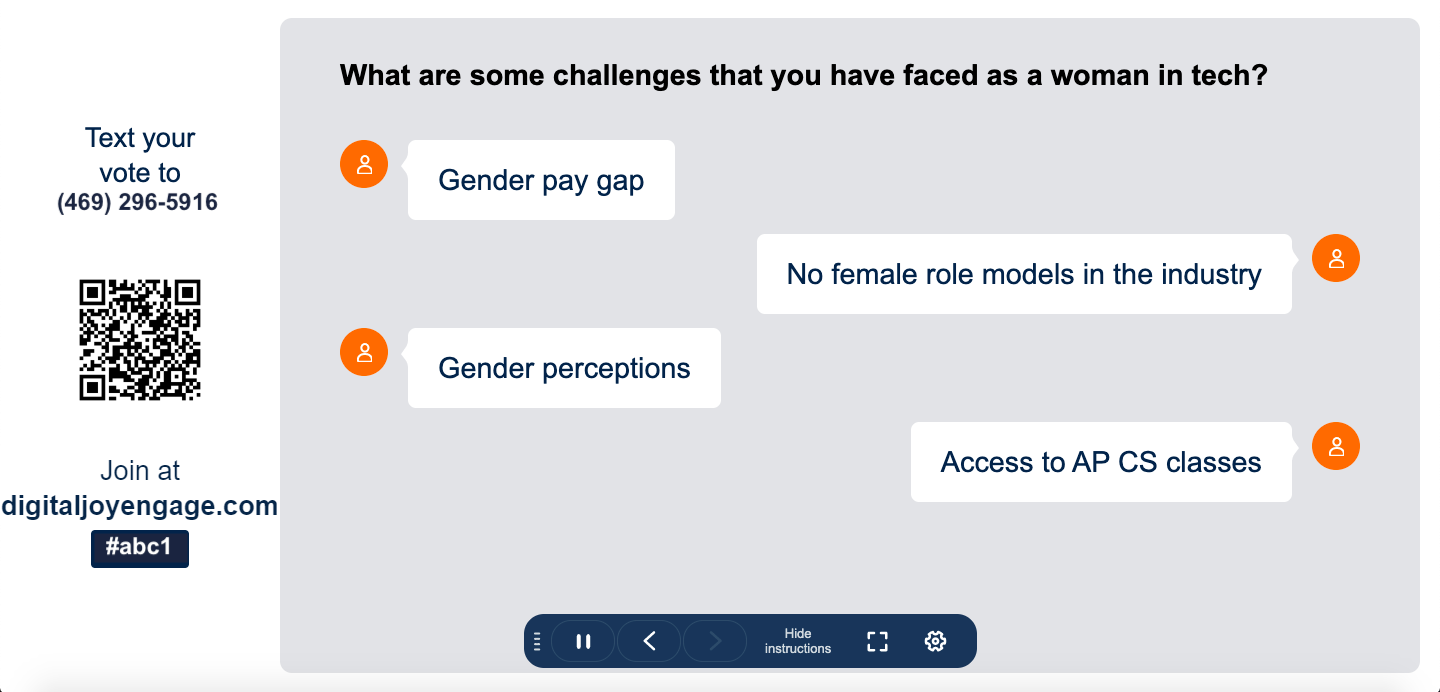
Word clouds
These are ideal for presenters who want to highlight popular feedback and short open-ended answers.
Word clouds are a hybrid of multiple-choice polls and open-ended questions.
Your audience submits responses in an open-ended format that appear on the screen as discrete words. The more of the same responses are submitted, the bigger that word becomes visually showing that it is more popular than its counterparts.
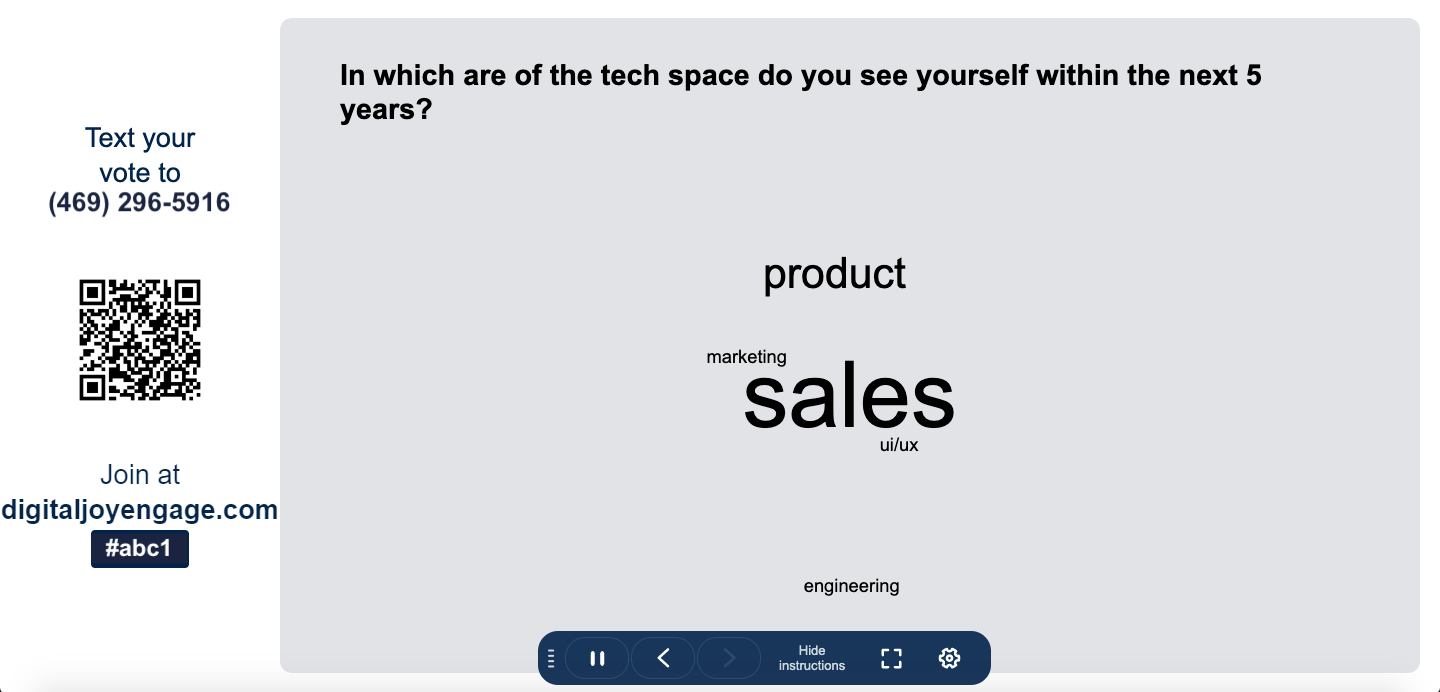
An active poll is the one that is currently live and it:
1. Takes over the phone number of your account and the votes are counted for that specific poll when it is active
2. The active poll data is inserted into the WEB widget and the on-air graphics (if available for your account) which is accessible using the event code.
When you start a poll by clicking the “Play” button or by launching a poll from scratch, the previous active poll is stopped automatically.
When you activate a poll, it takes over the phone number and the web widget (when joining via event code) of your account, so that from that moment on every vote submitted in each of these channels will be counted for the currently active poll.
Yes, you can have two web-based polls (not SMS). For the purpose of live voting, then it’s recommended to have only one active poll at a time. If you need to create multiple SMS polls simultaneously, please contact us at hello@digtaljoy.media.
To delete a poll click the more options button in the active poll view and select “Delete”;
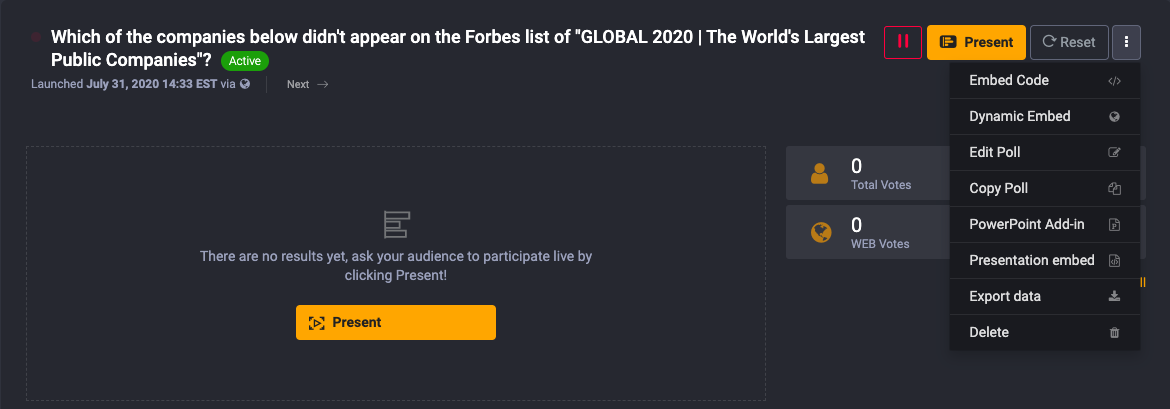
or open the 3-dots menu on the Polls page for each of the polls.
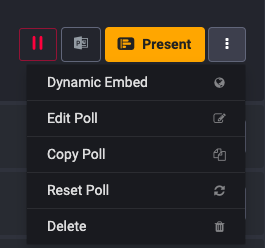
Please note that it is not possible to recover poll results after they have been deleted, nor will they be part of your exported data.
To add a new question/poll, you need to press Create Poll or Create New Poll.
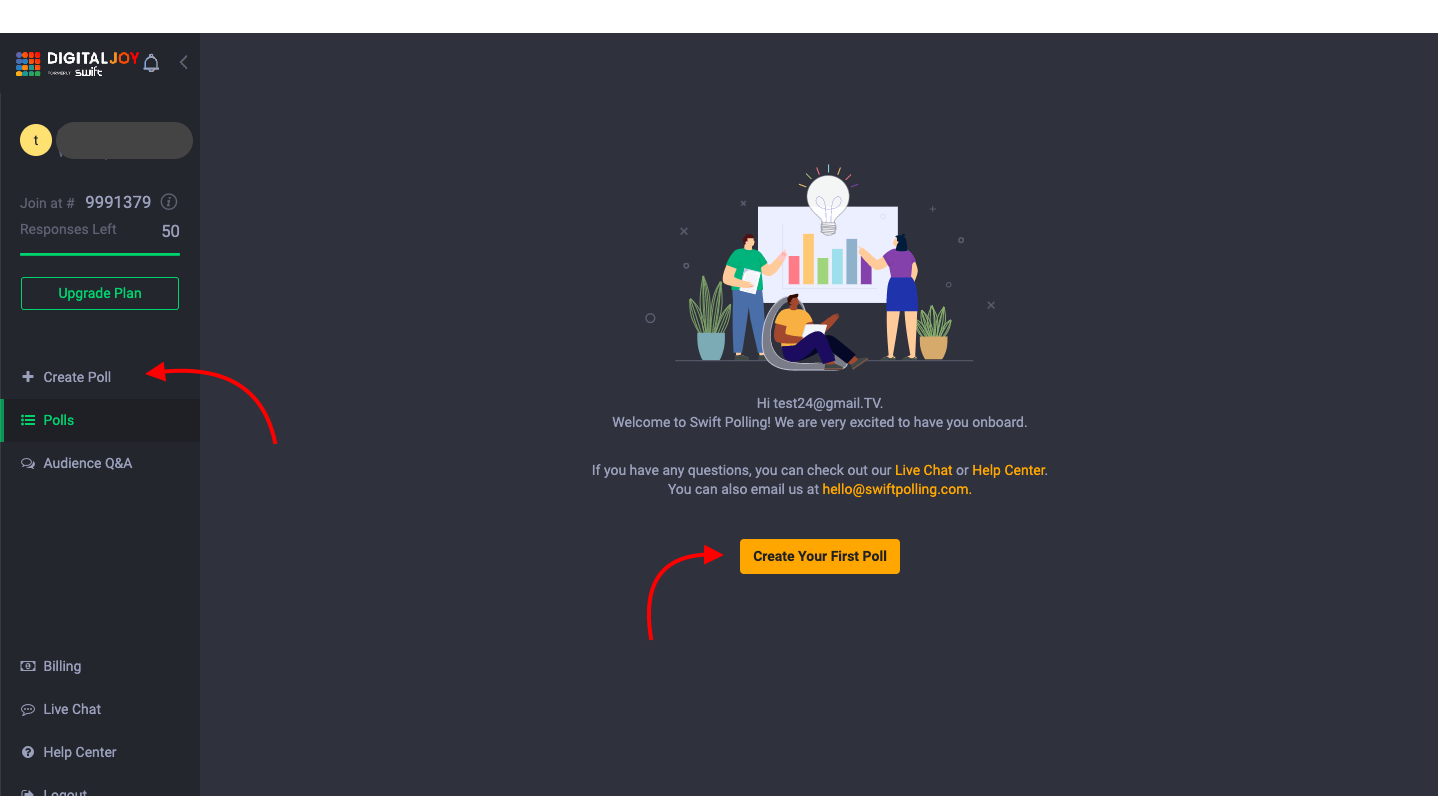
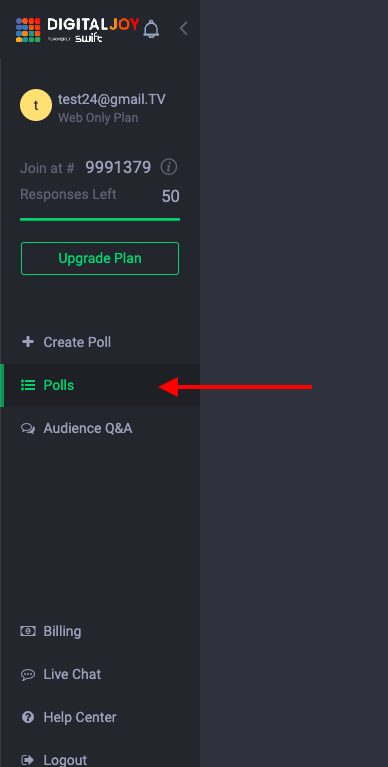
Then, to see all the questions/polls you created, click Polls.
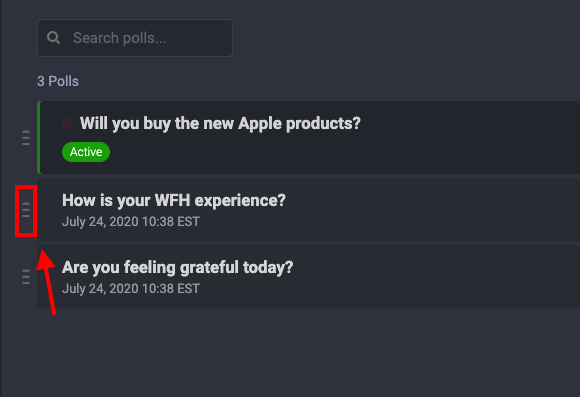
By clicking on the sandwich button, you can reorder your questions/polls.
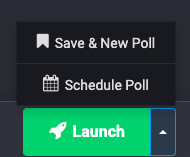
You can create a poll without automatically activating it by pressing the small arrow next to the “Create & Go Live” button and selecting “Create” option.
This way the poll will appear in the polls list, but will not be activated immediately. You can activate it later when you’re ready to use it.
Use Presentation Mode to see the real-time results of your poll.
Presentation Mode can be accessed by pressing the “Present” button in the active poll view or “Present” button in the polls list.
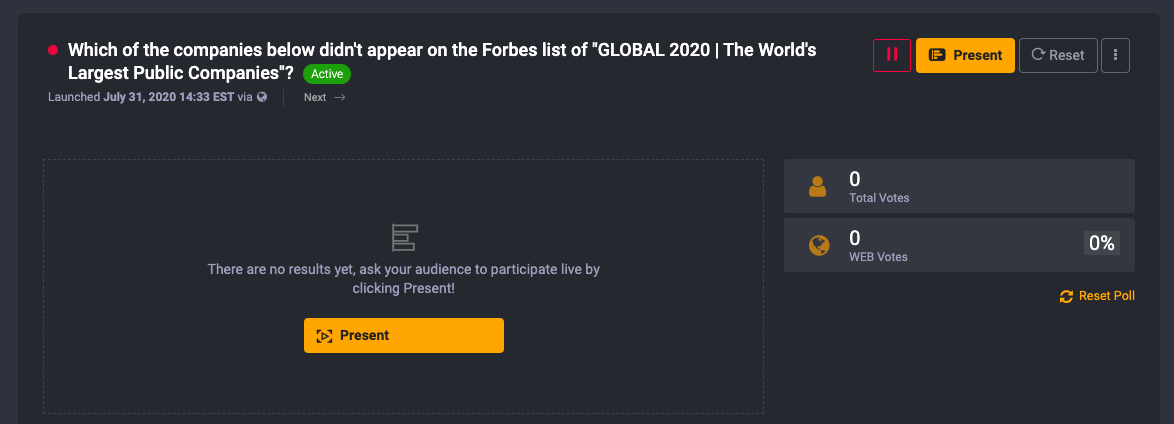
Depending on what is the type of your question (poll, open-ended, word cloud), you will be taken to a corresponding presentation page.

Yes!
To do that, choose the desired poll in the “Polls” list and select “Edit” in the pop-out menu as shown below.
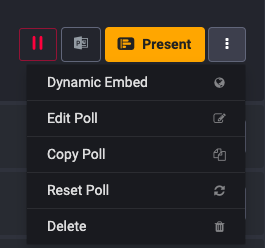
When editing a poll you can change a variety of settings, including:
– Question
– Options
– Options images (web)
– Poling template (web)
– Add or remove options
And many more.
Note: you can edit open ended or word cloud types of questions with the same workflow as described above.
You can schedule a poll without automatically activating it by pressing the small arrow next to the “Create & Go Live” button and selecting “Schedule” option.
A schedule pop-up will appear. Choose the date and time to activate the poll. Then click on Save button. Date and time is using US Eastern time zone.
If you scheduled your poll but need to reschedule it, do the following:
-
Edit your poll
-
Press Schedule button
-
Set the new dates or clear the dates if you want to remove the scheduling
-
Press save
Learn how to generate a word cloud from your audience’s responses.
Yes, to create a word cloud select “Word cloud” from the question type selection window.
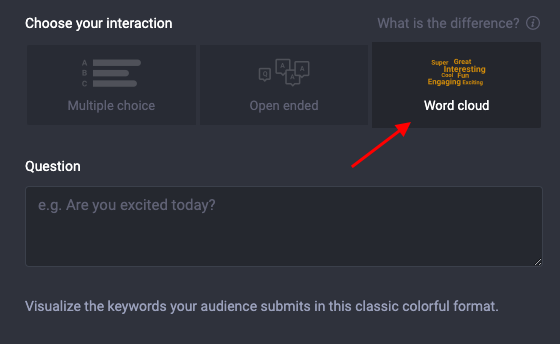
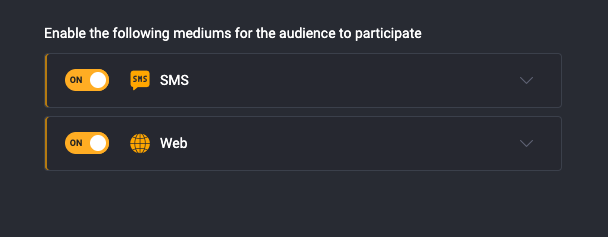
Then, continue with the next step to create your poll.
Once you have launched your poll, press Present to use the presentation mode to display the results in real time.
The poll channels are available for activation at the right-hand side of the poll setup page. You can choose one or more, depending on your plan and the state of your account.

Learn how to reset the results for your polls
In order to clear the results of your polls:
Click Reset Poll or Reset in the active poll view:

There are 3 types of embed codes available in Digital Joy Engage.
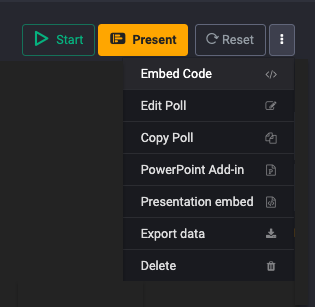
Go to the 3-dots menu on your poll details page and choose the Embed Code:
On the new window that will open you will see the following view:
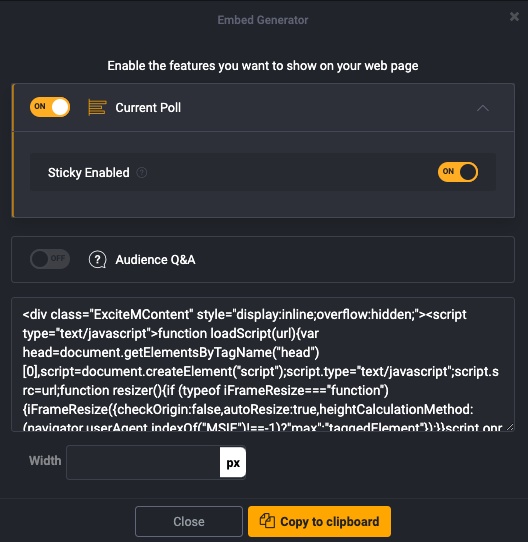
If you need to embed the poll on its own with the ability to activate and inactivate it, then turn on the Current Poll functionality only.
If you need to embed the poll on its own without the ability to turn it off, then additionally activate the Sticky Enabled mode.
If you need to embed the Audience Q&A, then turn the corresponding functionality on.
If you need to have both the Poll and the Q&A, then activate the Current Poll and the Audience Q&A.
Press Copy to clipboard to copy the embed code and insert it to your website.
If you’re using web voting, then you might be interested in what will show when your questions are inactive.
You’re in control of what to show with the web polling widget.
Here’s what to do:
-
Click on Web medium of voting
-
Click on “Advanced Settings” at the bottom right of the screen.
-
Go to “When a poll becomes inactive section”
-
Click on the drop-down and choose your Show screen
-
Save or Launch poll to save all the settings/changes

Learn how to copy polls and stay productive with Digital Joy
You can easily create new polls if you need to do some minor changes to existing polls. The “Copy” feature will help you save time and avoid creating a poll from scratch.
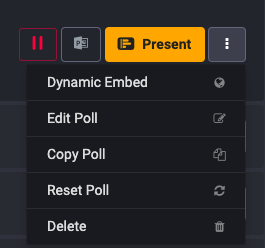
Use the “Copy” feature which will copy the existing poll data and insert it for you in a new poll without saving it, so that you can customize, launch, or schedule it.
Learn how to ask different questions to your audience by switching between them in the presentation mode.
In the Presentation Mode, there are navigation arrows on the right and the left side of the chart, which enable you to switch between questions without leaving the presentation.
Press ” > ” to go to your next poll and then click the Play/Pause button to activate/pause your question.
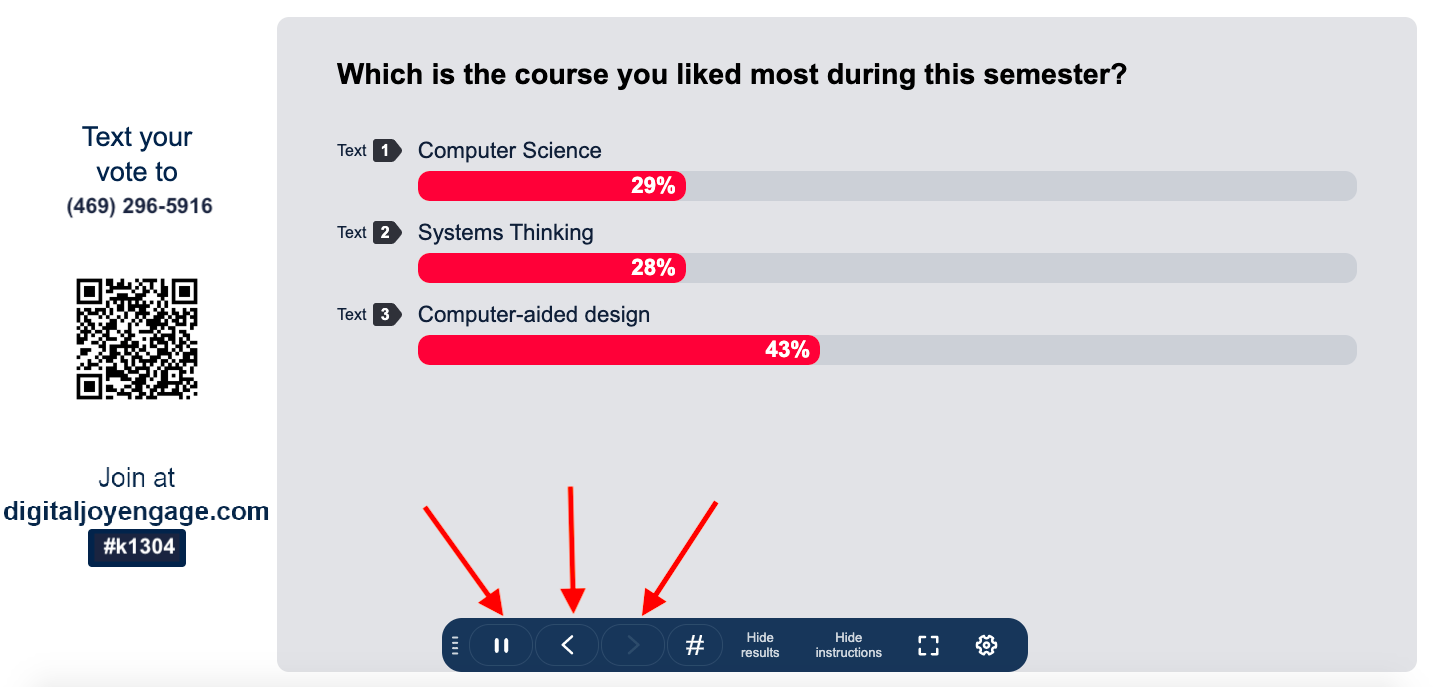
The votes are updated in real-time. When your users vote, the results appear in the dashboard and the WEB widgets instantly. In case of text message votes your mobile network load may affect the delivery speed of text messages, but in most cases the delay will be so slight as to be unnoticeable.
There is no limit on the number of options you can add for a poll in Digital Joy.
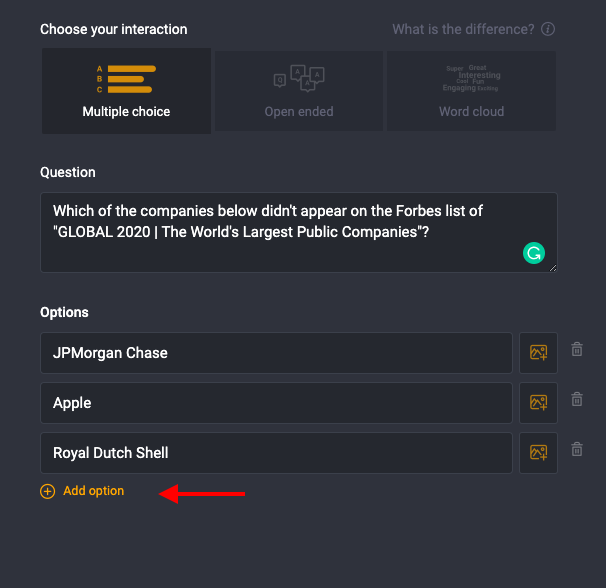
Poll instructions are exposed in the Presentation Mode and in the active poll view in the dashboard.
When you switch to the Presentation Mode, it will contain the instructions on what a person needs to do to access your WEB poll or to vote with a text message.
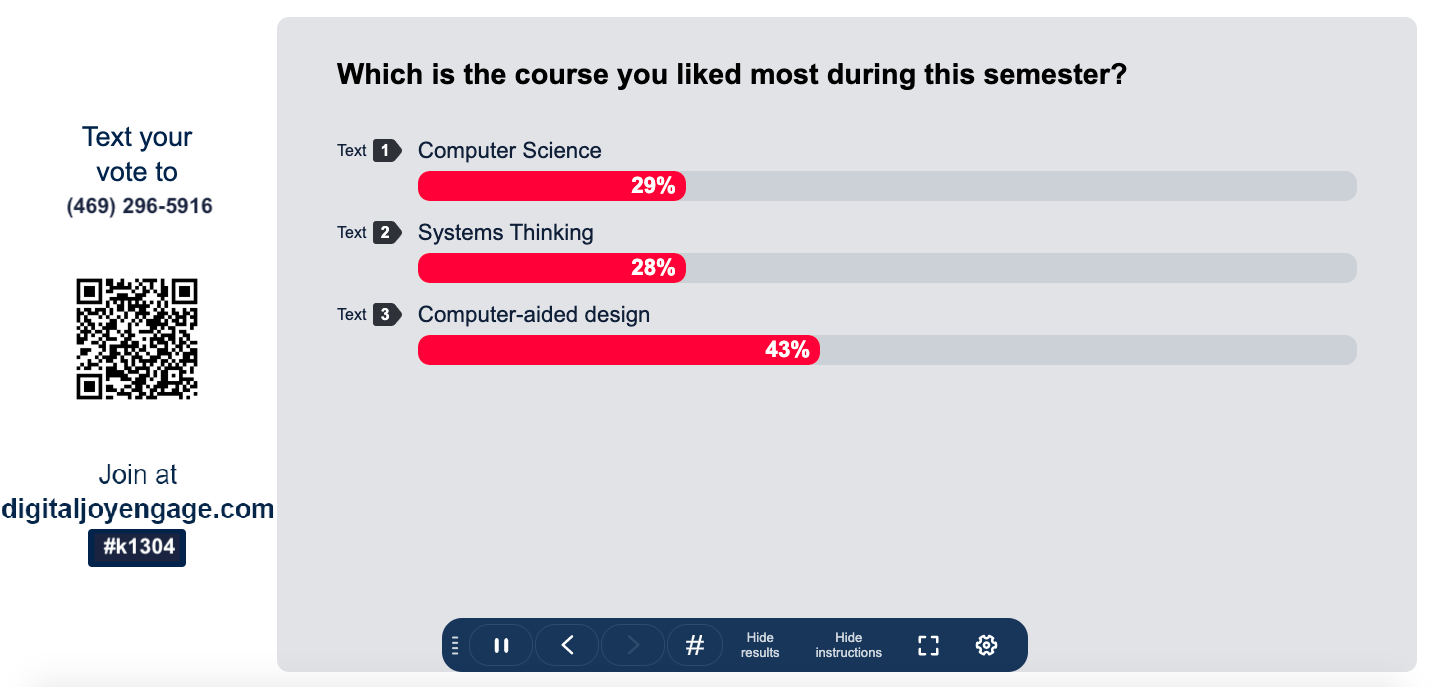
Each of the options in your polls is attached to a number starting from 1. To vote, your audience needs to send one of the numbers (as instructed in the Presentation Mode) to your dedicated phone number in a text message.
To reset poll results click on your poll, click Reset Poll in the active poll view.

Learn how to create multi-question poll using Poll Groups
Please refer to the topic “Poll Groups’ to learn on how to create more than 1 question poll
Learn how to set up a beautiful web poll by selecting a template and a background from the gallery.
In order to create a WEB poll, log in to your Digital Joy Engage account and:
-
Click on + Create Poll from the left menu
-
Enable Web feature & click on Next: Polling Data
-
Enter your polling data & then click on Next: Visual Settings
-
Select which template to use
Edit the background image
Edit the font
Edit the layout of the template
Learn how to filter responses on the open ended and word cloud presentation pages.
The following moderation will be available for you once you create an open-ended question:
Enable Profanity filter to deal with troublemakers in the audience

Enable Anonymous feature to provide a fully transparent experience to your audience. This will hide phone numbers and user IDs of respondents.

Archive questions if you no longer need to display them but want to keep them in your database.

Delete comments and questions as needed.
You can Approve comments and questions before they go live on the Present page.

To create an open-ended question poll:
-
Press + Create Poll
-
Choose Open-ended
-
Configure voting medium settings (choose either SMS, Web or both)
-
Click Next: Polling Data to enter poll question
-
Continue by clicking Next: Visual Settings to customize poll visuals
-
Click on Preview & Launch
-
After confirming that the poll is ready, click Create & Go Live to launch it.
Create a word cloud to bring in more excitement and interactivity.
To create a word cloud:
-
Press + Create Poll
-
Choose Word Cloud
-
Configure voting medium settings (choose either SMS, Web or both)
-
Click Next: Polling Data to enter poll question
-
Continue by clicking Next: Visual Settings to customize poll visuals
-
Click on Preview & Launch
-
After confirming that the poll is ready, click Create & Go Live to launch it.
In Digital Joy Engage, you cannot have more than one active text-enabled question at a time, because each account is assigned only one phone number for response collection. When you activate a text-enabled question, it takes over the phone number to ensure that all the incoming responses are counted for the desired poll only.

That is not the case for web polls. All of the web-enabled polls you create are always active. Every web-enabled poll has a unique URL, which you can find in the question’s detailed view. Just click “Web Voting” and you will be taken to the poll’s unique URL.
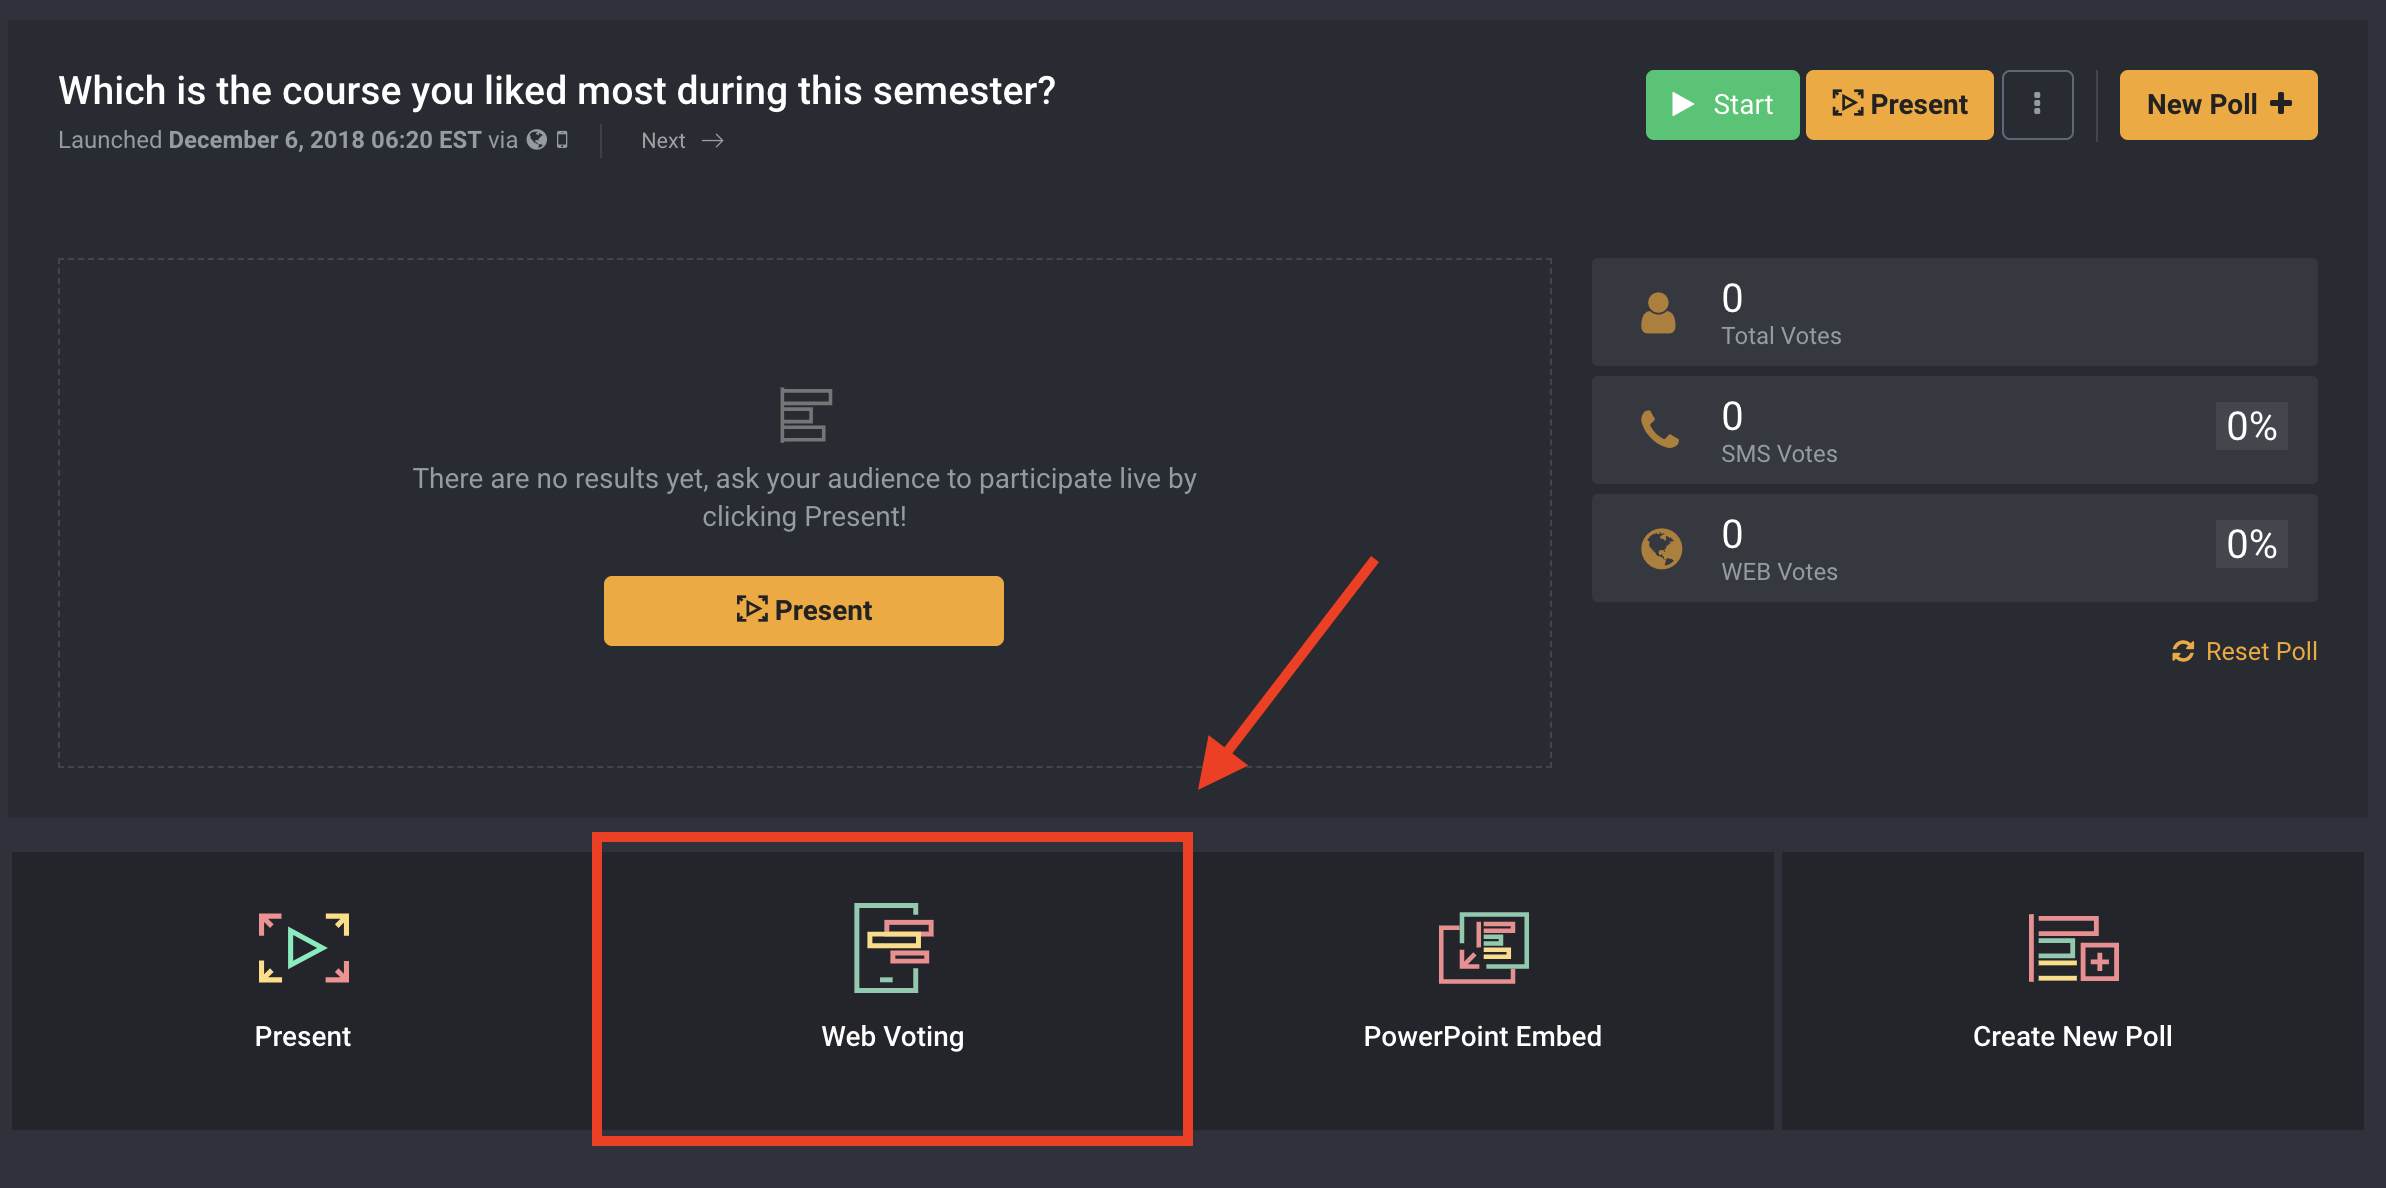
Note: If you want your audience to join your web poll using an event code, they cannot access more than one poll at a time. The poll that has been activated using the Start button will be visible. Otherwise, you can provide the web polls’ links to your audience, so that they access those directly.
Here are a few settings available word cloud for word cloud moderation:
Enable the Profanity filter to deal with troublemakers in the audience.

Enable the Anonymity feature to provide a fully transparent experience for your audience. This hides phone numbers and user IDs of respondents.
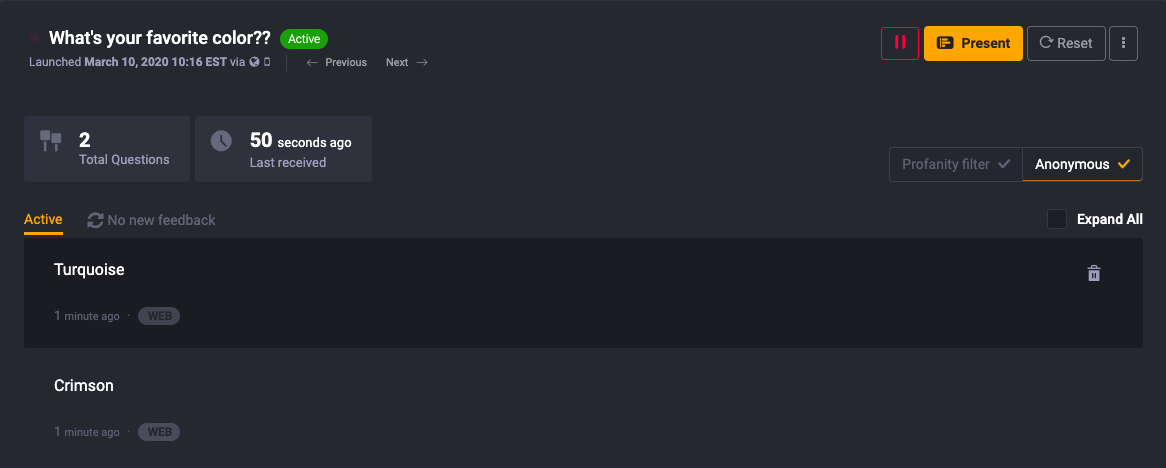
Delete individual submissions as needed.

Get your poll results presentation on-screen and explain how easy it is to vote.
The presentation page contains all the necessary information to let the users start voting.
There is no limit to the number of options/answers you can add for a poll in Digital Joy Engage.
After selecting ‘Multiple choice’ click on ‘NEXT: Polling Data’:

Then key in your question and answer options:
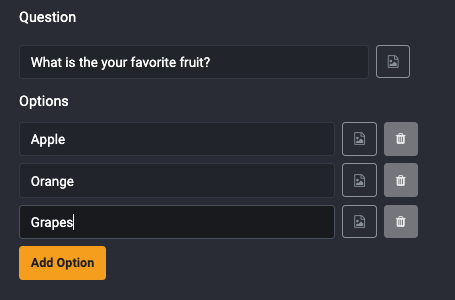
Click ‘Next: Visual Settings’ to configure the poll visuals

Click on ‘NEXT: Preview & Launch’ to review poll settings:

Click ‘Create & Go Live’ to launch your poll

The main language we support is English but we do have many customers using our platform in several other languages. If you are running into issues with a specific language then please let us know.
Contact us at support@digitaljoy.media for more information.
Learn how to export your poll results from the dashboard.
Go to the Polls section (left-hand side of your dashboard)
Click on the poll you want to access
On the Poll Details page, click on the 3-dots menu.
Choose Export Data. You can export and download the results of your poll from the dashboard.

Once set, your event code will always be attached to your account. Event codes in Digital Joy are unique. We do not remove or change event codes for our users unless the user has an Enterprise plan.
Polling Settings
Learn how to use the producer mode to send your polls to live broadcast
The Producer Mode is a paid-tier feature that allows users to send poll questions and results to appear on a live broadcast. To do this, follow the steps below:
1. Create a new poll that will be sent to broadcast and then save it.
2. On the poll details page, click on the ‘Producer Mode’ button to access the live broadcast settings:
3. From the dashboard, you can see the available templates that can be used to display the poll. You can also request for custom templates created by contacting us at support@digitaljoy.media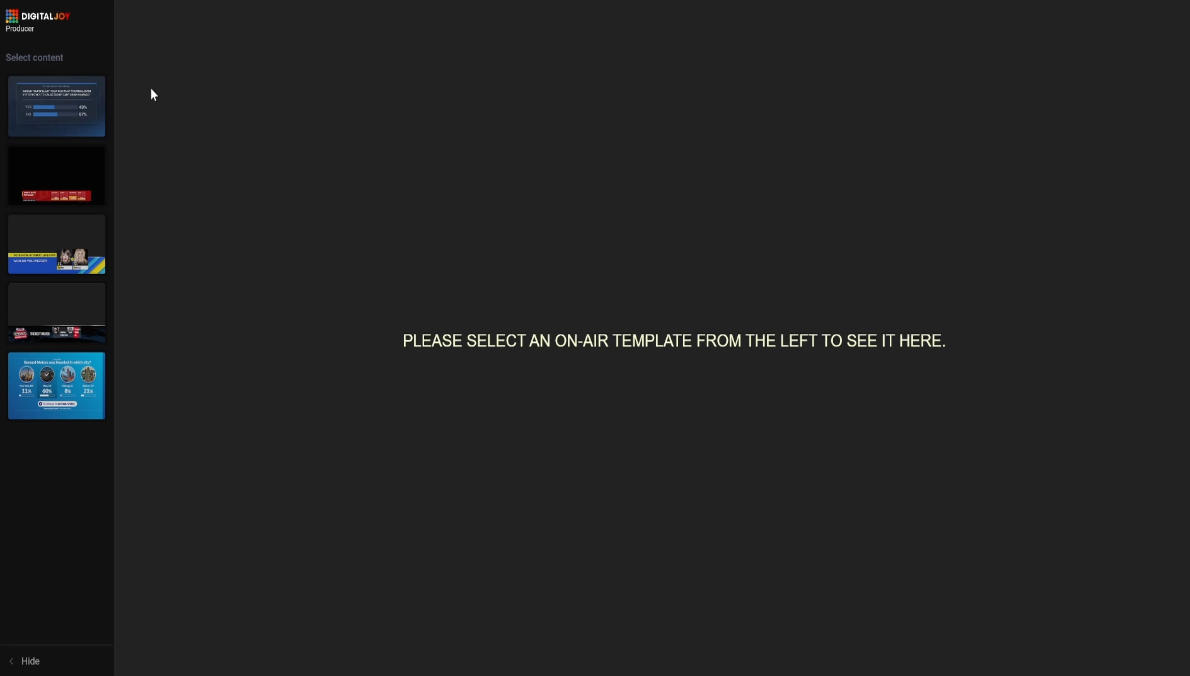
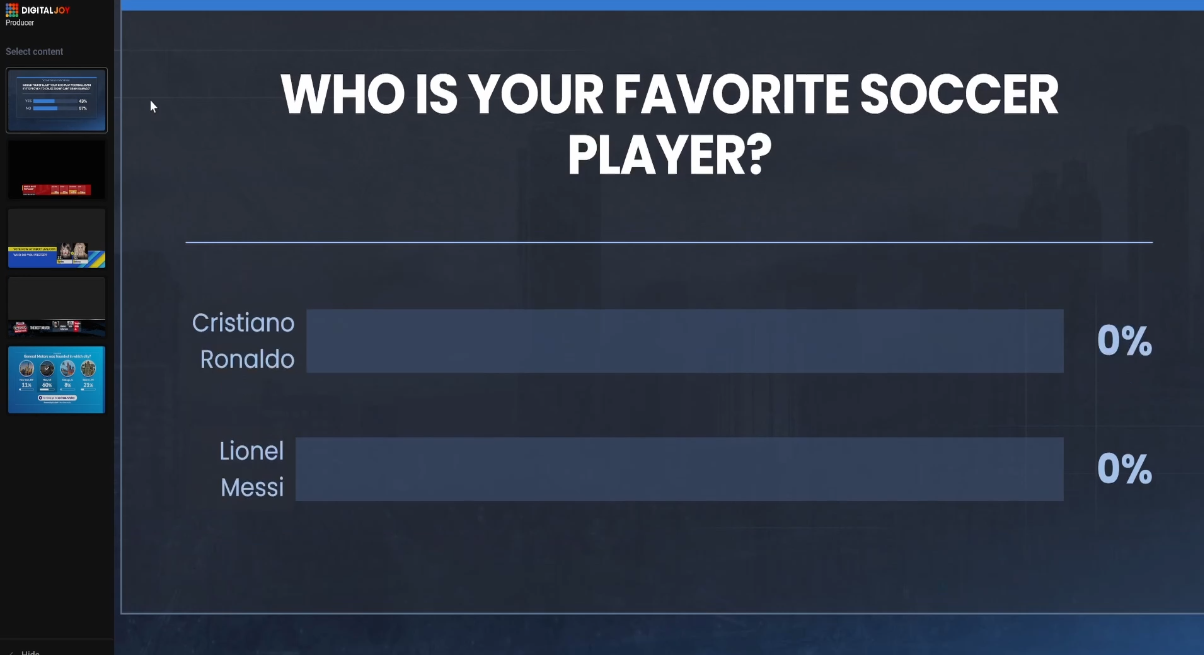
3. Some templates also have a green screen: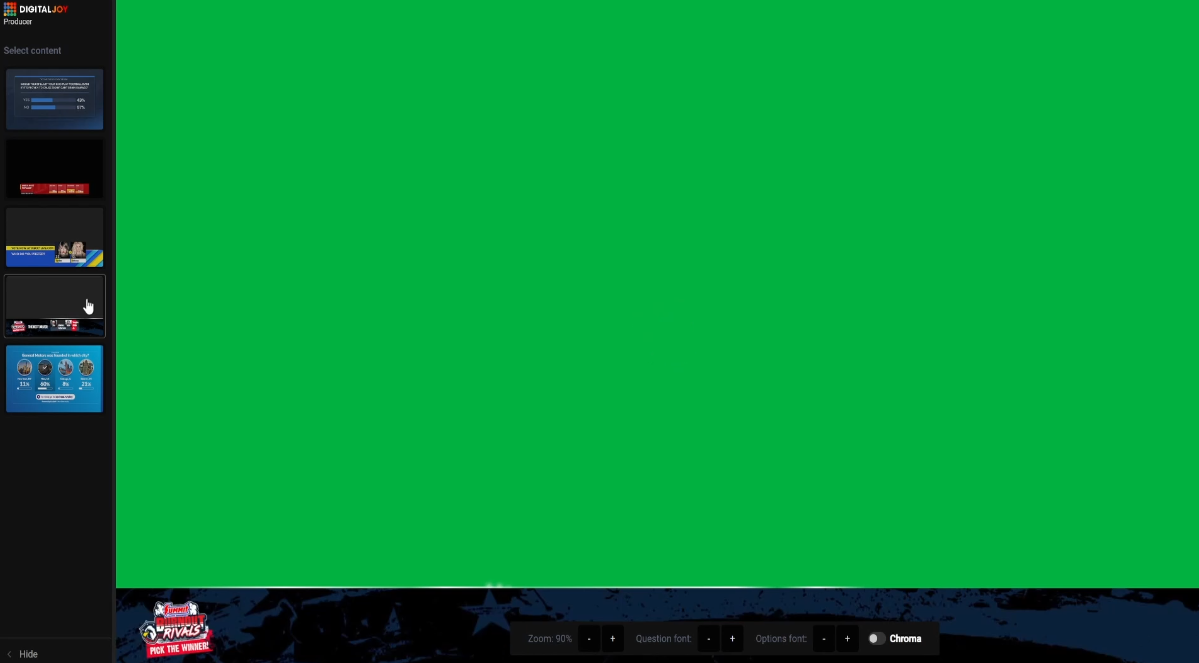
4. Use the control panel at the bottom of the screen to configure the template size as well as the question & option fonts
5. Use the chroma toggle in the control panel to wrap the entire template with a transparent background where you can put any content you want in
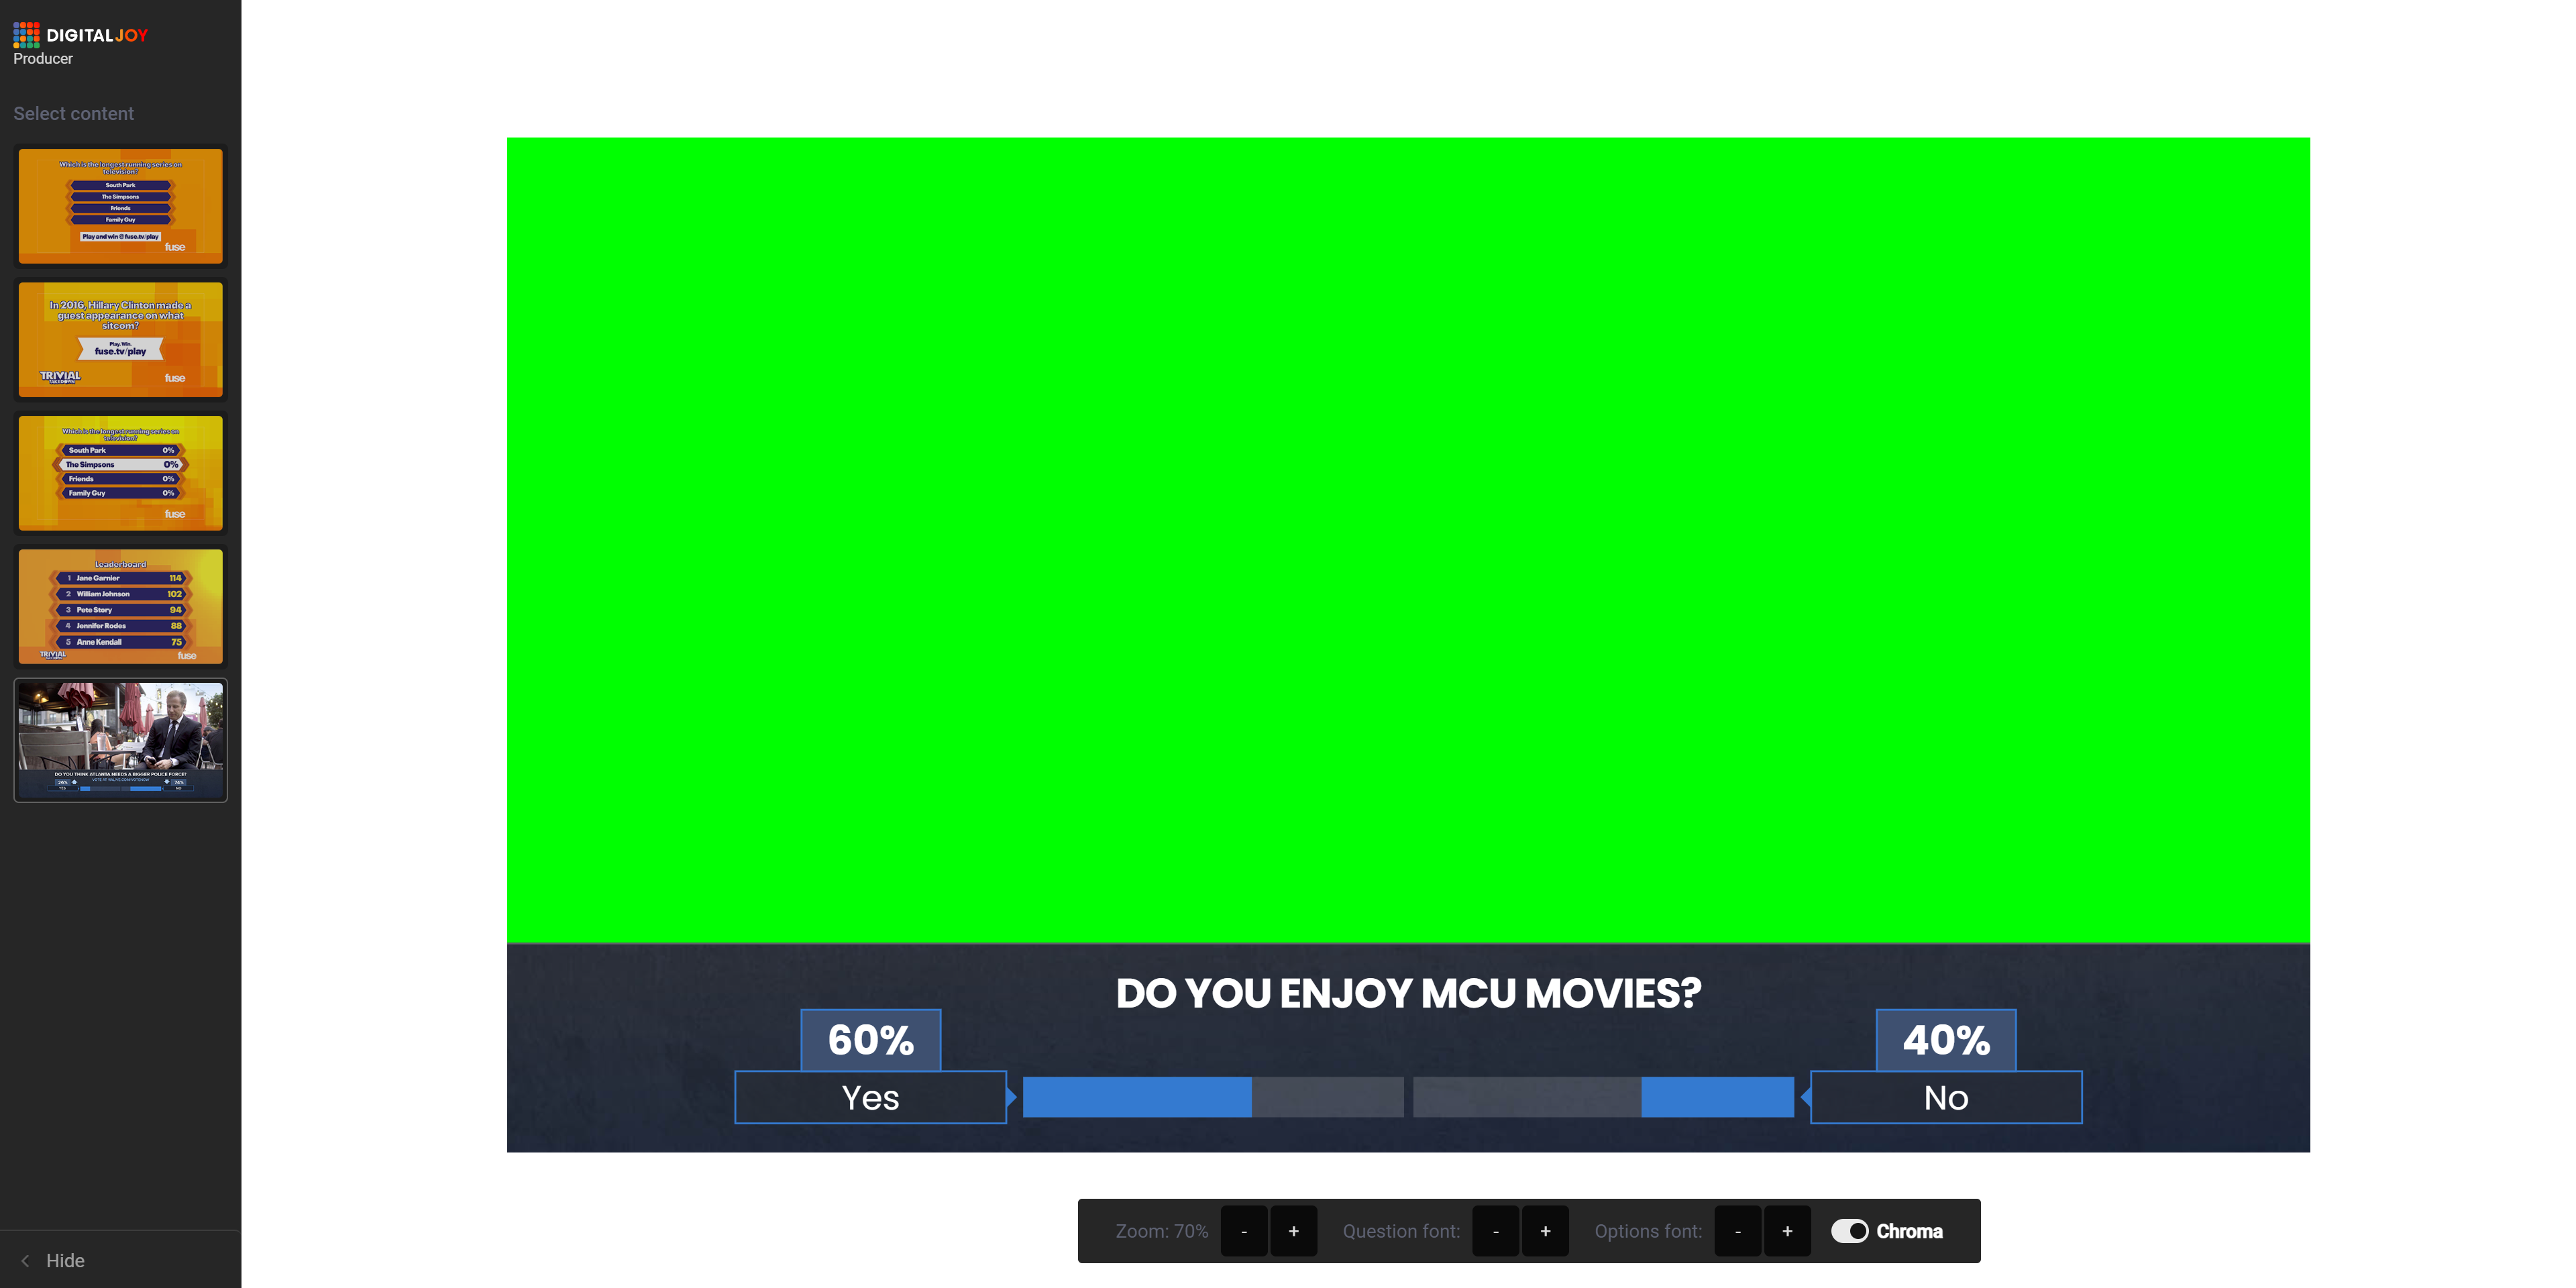
6. You can also share the Producer mode dashboard with other people by clicking the arrow beside its button and copy the link to be shared
Click here to learn how Bakersfield is using Digital Joy Engage on their live feed.
When setting up WEB voting for your poll you can choose to indicate the correct option in the results page of the widget.
To do that, go to WEB settings and click “Advanced” either when creating your poll or when editing it.
Scroll to the “Results” section and change:
“Correct Option Enabled” to “ON”
the “Correct Option” to the desired option from the drop-down list
and switch “Show Correct Option on Results” to “ON” (is set to “OFF” by default)
Note: this feature may not be available for some of the web templates. Availability may change without notice.
In order to select a background for your web template, go to Visual Settings -> Background section. Then click on any image you would like to choose as background.
You can upload your own background image using the “Upload Image” button
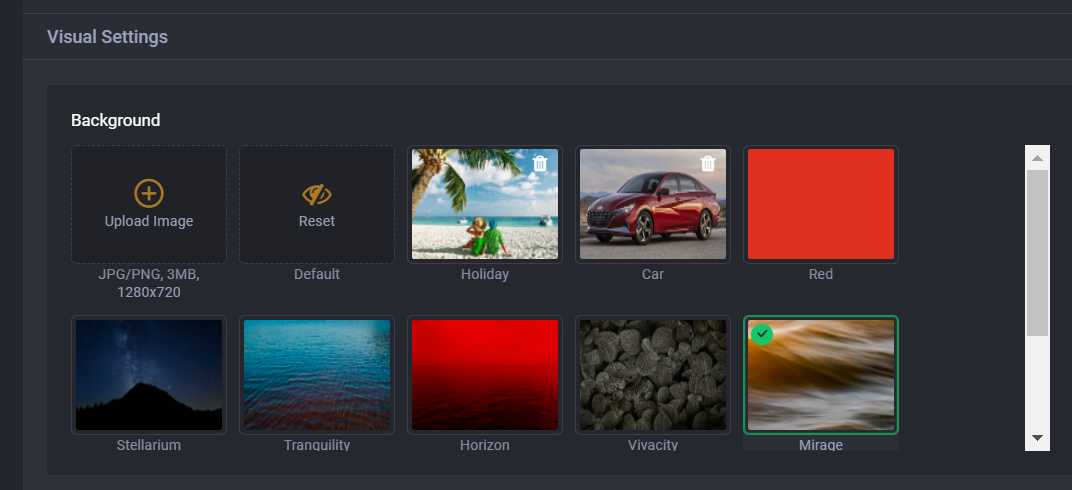
You will see all the available backgrounds in a gallery.
A template is a web page which will be shown to your users when they access your event by entering the event code in digitaljoy.com.
Templates are used to vote on the web, without sending a text message.
Digital Joy supports a range of pre-made web templates with all plans out of the box. Some of the templates support uploading images for each of the options.
All templates support changing the background by choosing one from the list of available backgrounds.
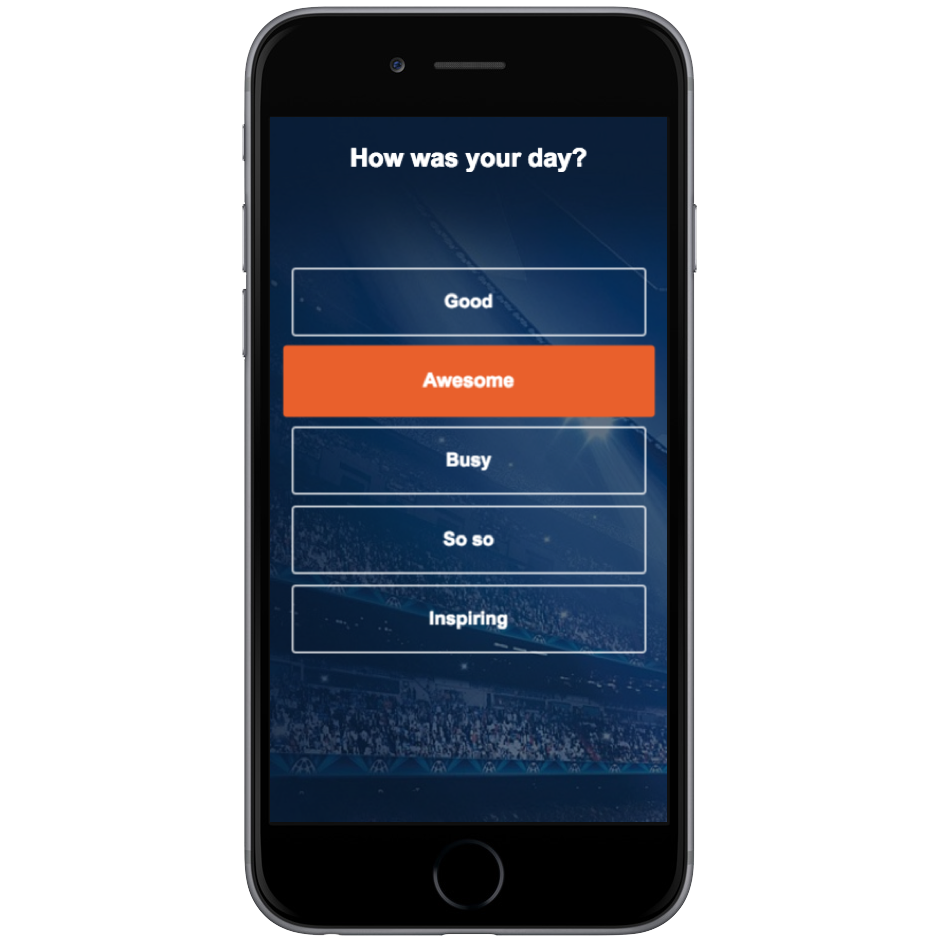
An example of a web widget.
Voting
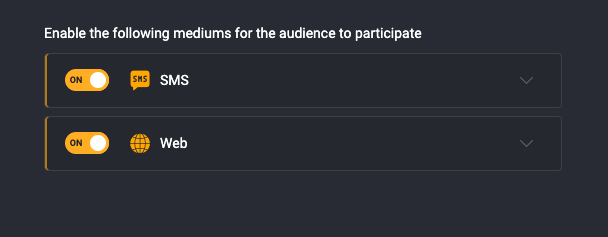
The poll channels are available for activation at the right-hand side of the poll setup page.
You can choose one or more, depending on your plan and the state of your account.
Share the poll link with your friends without using any event code.
Sharing the poll link is viable for web voting only.
Despite the fact of how many questions you have that your audience would need to participate in, single or multiple, you need to follow the next steps:
- Create poll
- Launch poll
- Go to digitaljoyengage.com
- In the event code field insert your event code*
- Copy-paste the link of that page and use it to share with your audience
- The link will show the poll that is active (you can have only one active poll at a time)
- You can control what to be visible when no poll is active**
- If you want questions to go live one after another without any delay, then you can link your questions.*** This way, you won’t need to activate each question in your poll-chain.
*Learn what an event code is and how to find it.
**Learn how to control your page visibility when no poll is active.
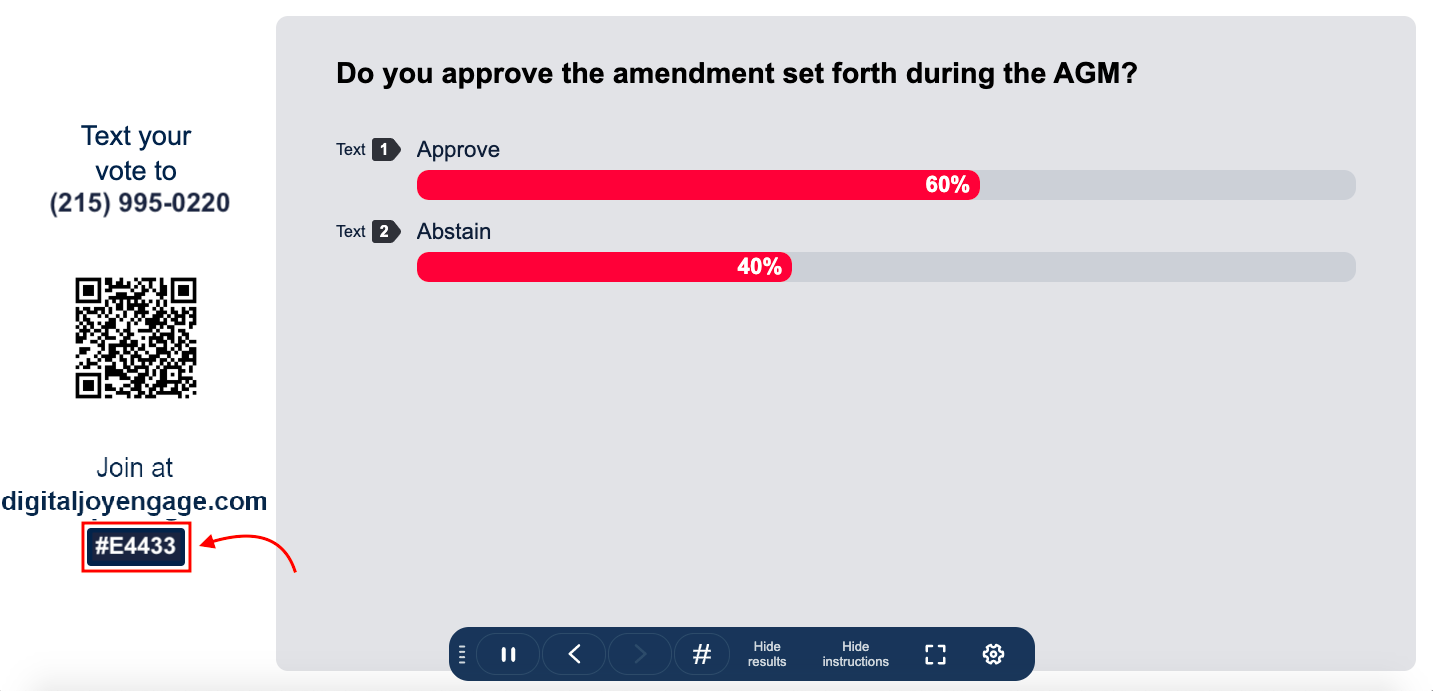 Every account is automatically assigned a random event code consisting of letters and/or digits.
Alternatively,
You can find the event code in your dashboard, on the left navigation bar.
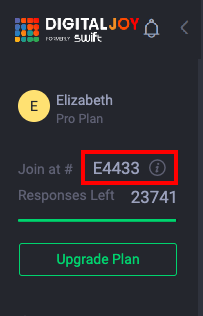 Note: You can submit a request to change your event code if you are holding a bigger plan.
To embed a poll into a web page or a mobile app, you need to access the Embed Code.
The Embed code can be found in the active poll view and in the polls list by clicking the more options and selecting “Embed Code.”
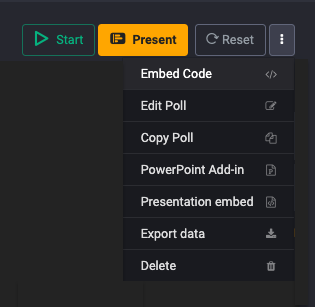
You will see the embed code popup. To copy the embed code click “Copy to clipboard”
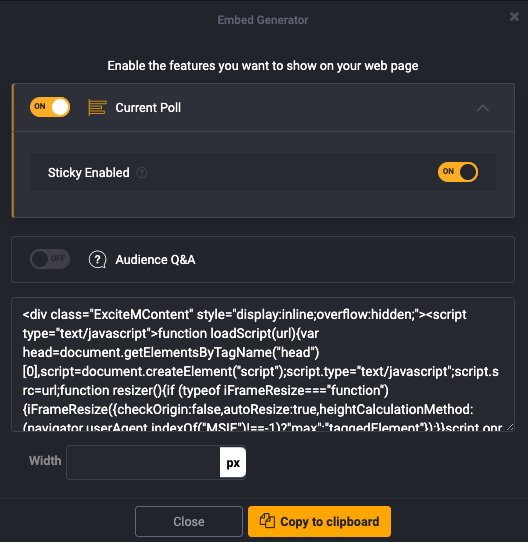
If you have a designated area for the poll that you want to ensure it fits, you can type the desired width and height in pixels to get the best responsive view. These fields add additional parameters into the embed code, which ensures the poll looks as good on your website as possible
Your participants can either use the texting or web feature as follows:
Web:
Navigate to digitaljoyengage.com on any mobile or tablet browser
Type your event code and click “Join”
Texting-In:
Text the number shown in the “Presentation” page
Results will update in real-time
Yes!
Each poll has a feature called Number of Votes allowed per device. This feature allows limiting voting from once up until unlimited.
The default setting for polls is “1 response per device”. This means that from one phone number only one vote will be accepted, and one vote will be accepted on the web too.
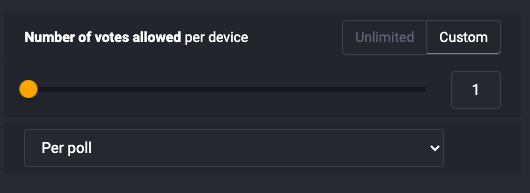
Important: When this limit is enabled, the same person can vote by both SMS and web, because there is no way of tracking the same person across voting channels and identifying if that person has already voted through one of the mediums.
You can change that limit using our slider and set it to a custom amount:
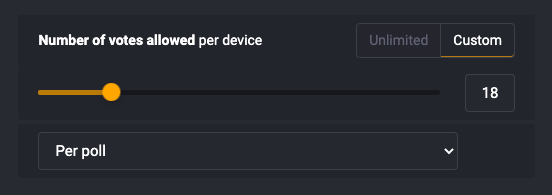
If you don’t want to impose any limits, then set it to Unlimited:

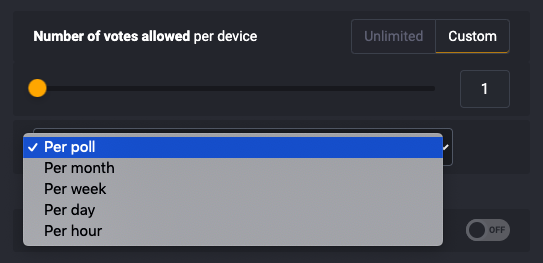
Additionally, you can restrict the voting limit to apply per poll, per month, per week, per day, or per hour.
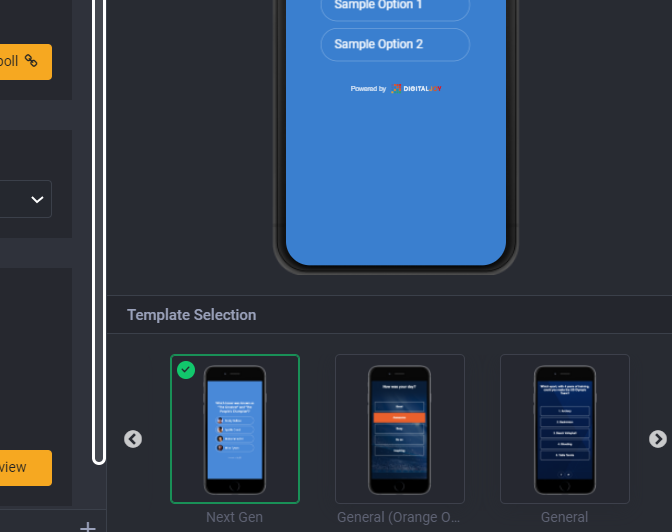
Select Next Gen template from the bottom right panel
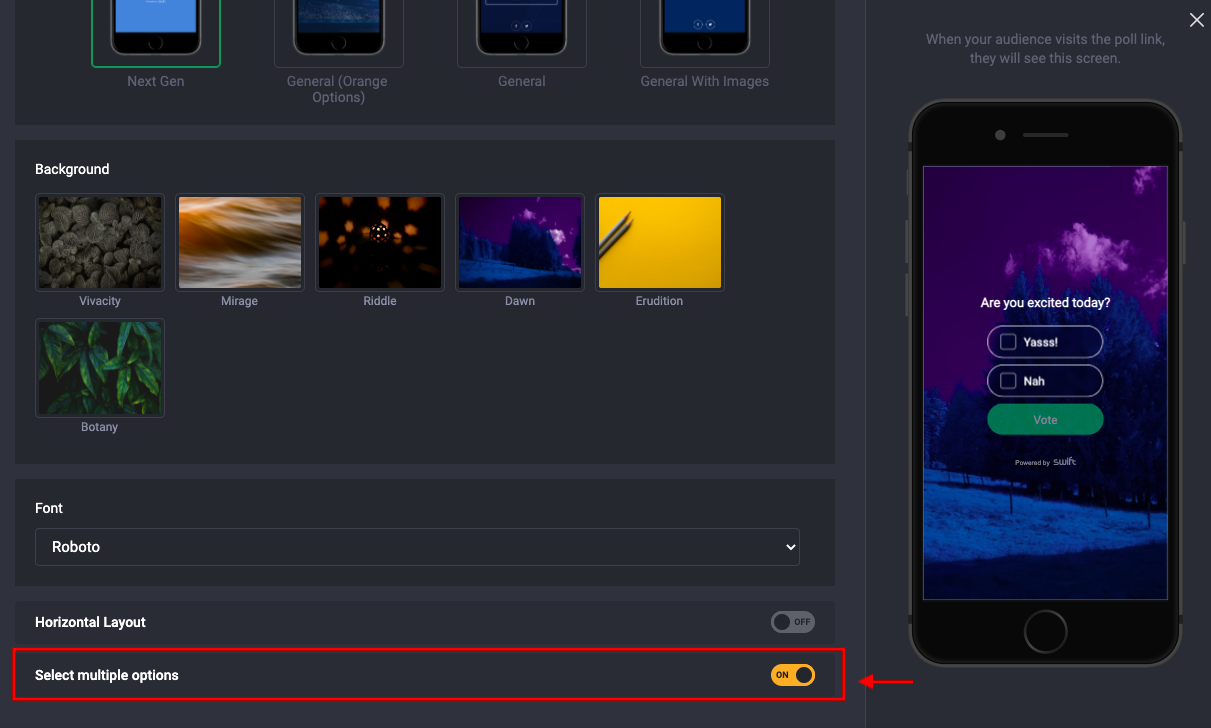
Scroll down and activate Select multiple options
Close the window and Save or Launch your poll.
You’re all set!
There are two ways to accept votes, comments and/or questions
Your audience has to type their entries and send in a text message to your dedicated phone number
By accessing the poll widget by going to digitaljoy.com on their mobile devices and entering the event code (set up in advance for your account)
The process is the same for polls, open-ended questions, or word clouds polls.
To vote online follow the next steps:
Go to digitaljoy.com
Enter the event code in the corresponding field
Press Join
Pick the option you want to vote for.
Yes! WEB voting is supported with all Digital Joy plans out of the box with a range of standard web templates to choose from.
A few things to know about web voting:
Your participants don’t need to download an app, the software is fully web-based.
Your participants don’t need to register or sign up unless required by you.
Your participants will need an Internet connection to vote on the web.
The Digital Joy Engage dashboard, presentation page, and web widgets are optimized for most modern browsers, including Chrome, Safari, Firefox, and IE (Edge) most recent versions.
If you experience issues with your browser, please check if you are using the latest version.
If the issue persists, please contact us in live chat or via email at hello@digtaljoy.media.
Your choice depends on what you want to achieve.
If you have a presentation that contains many slides and your poll is a complement to the rest of the information you want to convey, then use the presentation embedding feature.
If you only want to present the real-time updated poll, then use the full-screen display of the Presentation Mode.
You can use the whitelisting feature to restrict your participants.
- This feature is available at the fourth step of poll setup for single question polls. While for poll groups, this feature is available at the bottom of the engagement setup page.
- To create your participant’s whitelist, click on Create Whitelist.

- On the whitelist pop-up, enter the name of your whitelist. This is for identifying your unique whitelist in case you want to re-use the list later.
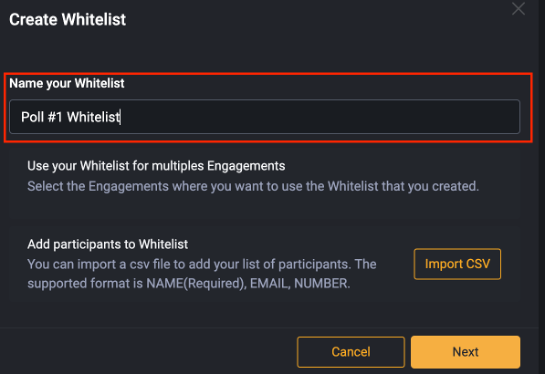
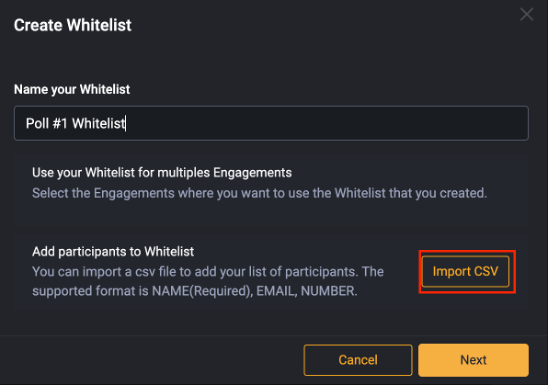
- You can choose either to key-in your voter list manually or upload a list file (in csv format).
- To upload the voter’s list, click on the Import CSV button and then proceed to choose and upload your file.
- For manual key-in, click on Next button to proceed.
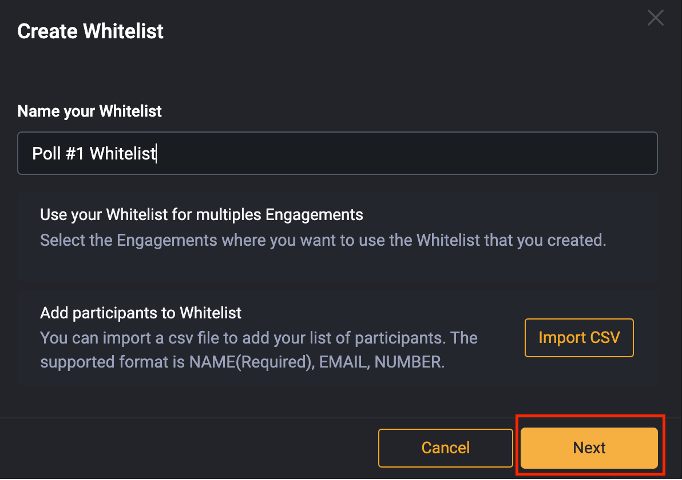
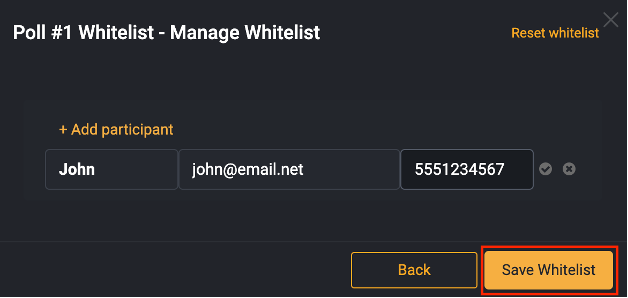
- In the next window, click on + Add Participant and then start entering the person’s name, email address and/or phone number.
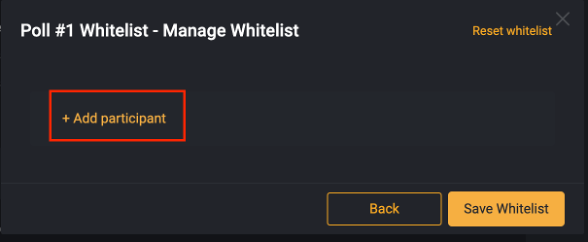
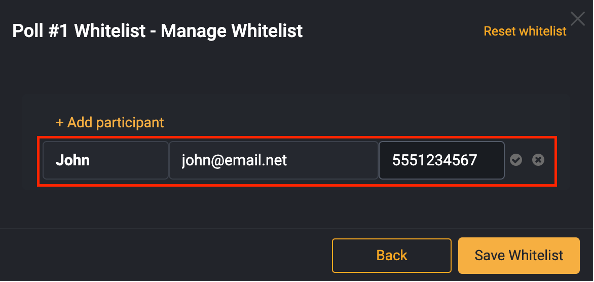
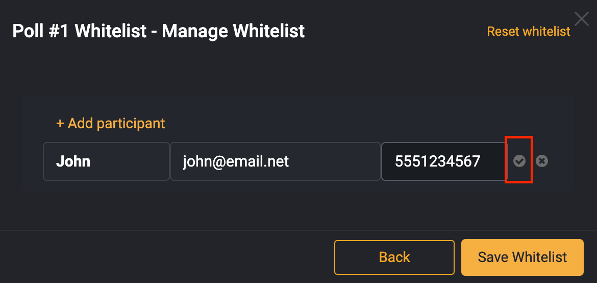
- Click on the tick button beside the participant’s details to save it.
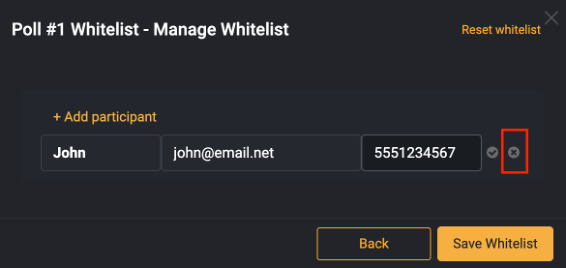
- To remove the participant, click on x button beside participant’s details.
- To add more participants, click again on + Add participant.
- After completed keying-in the participants, click on Save Whitelist.
- Once completed, to send the email invite for web-based voting, click on the Send Email button to send the invite link to the participants for them to start voting on your poll. Please ensure that you have completed and saved your poll before sending the invite.

- For SMS voting (only applicable for single question polls), refer to the SMS Voting section for how the participants can cast their vote. Only the votes from phone numbers registered in the whitelist will be counted.
- To edit your whitelist, click on Manage Whitelist.

- To clear your whitelist, click on Clear Whitelist.

SMS Voting
Digital Joy supports voting with SMS as part of subscription and one-time plans
To vote by SMS, your audience needs to text the option or the sequential number of the option to the phone number of your account.
Here’s an example poll.
Do you accept civil marriage?
Yes
No
It depends
Now, to vote for the second option someone can text either “No” or “2”, both will be counted as a vote.
Please note that in case the voter chooses to send the option itself, it has to match your poll’s option exactly. Any typos or additional characters will make it an invalid vote.
SMS voting will be disabled for your account if you do not renew after your plan expires.
Yes. When you activate SMS voting, you are asked to choose a phone number. This phone number will be connected to your account no matter how many polls you create. It will also remain if you renew your plan before expiration.
By default, the phone number will be removed from your account upon the expiration of your plan.
Theoretically, a phone number setup for your account can always stay available for you if you constantly use the service.
Note: This phone number is not your personal phone number and will be used for voting purposes only.
If your audience submits a response through SMS and makes a typo, the following will happen:
their vote will not be counted as part of the overall results,
your responses will be deducted.
To prevent this issue, make sure to clearly communicate the voting instructions ahead of time.
Currently, we support phone numbers for the USA, UK, and Canada.
If you are from a country that we don’t provide local phone numbers for, specify your country and submit a phone number request. We will reach out to you once we add a local phone number for you.
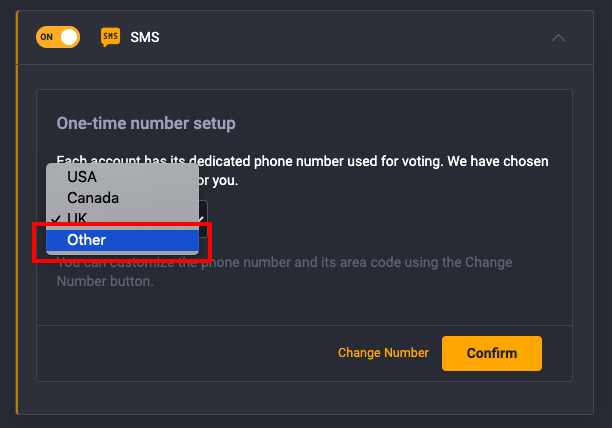
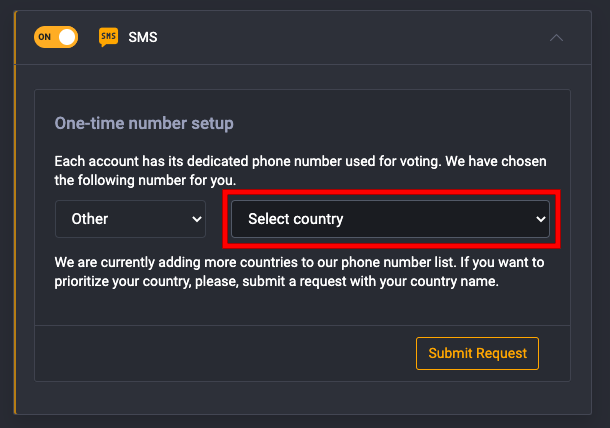
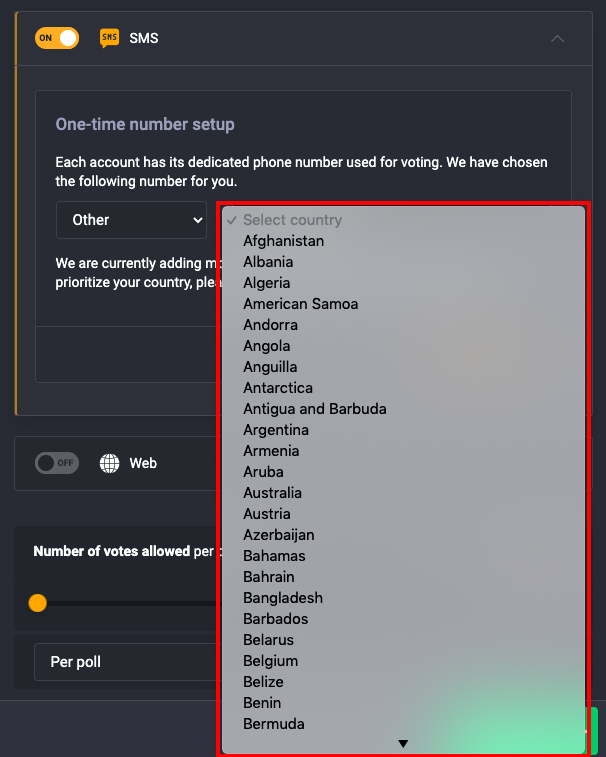
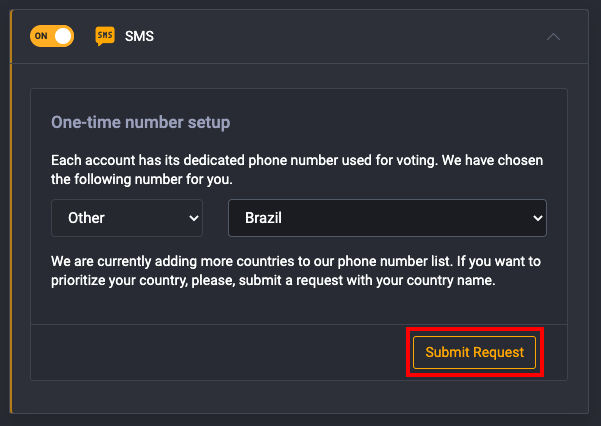
Please contact us at support@digitaljoy.media for more information for custom phone number.
When you create a poll, each of the options is attached to a certain number starting from 1.
To vote, your audience needs to send one of the numbers (for example 2) or the option itself to your dedicated phone number in an SMS.
Here’s a poll for example:
Which is your favorite fruit?
Apple
Orange
Banana
To vote for Banana, text 1 or banana to the phone number.
After the vote is accepted, the voter will receive a confirmation text message which can be customized.
Learn about Digital Joy’s phone number policy
No, you cannot change the phone number of your account after registration. Please make sure you search for the required area code when selecting a phone number.
Once your account expires, SMS voting is no longer available for you to use.
When your account expires, you can no longer use the SMS voting feature. If you have polls that have been running by SMS voting only, you will no longer be able to activate those.
Once you upgrade to any of our paid SMS-inclusive plans, SMS voting will be reactivated. You will be able to reuse all of your polls.
If you have a one-time plan, your account will expire after the end date.
If you have a recurring plan, then your plan will auto-renew, therefore, there is no risk of running into such an issue. You will be notified about the renewal one week ahead of time and if you need to cancel your subscription, you will be asked to contact us.
Every new Digital Joy account has its own phone number, which is selected by the user when activating the SMS medium of voting for the first time.
The phone number of your account is only available to you. It will not be shared with anyone else. You own the responses sent to that phone number during the period it is attached to your account.
When activating the SMS medium for voting, you are asked to pick a phone number.
Note: This is not your personal phone number; it is a random number that will be used solely within your Digital Joy account.
Having that said, pick a phone number that catches your eyes best, then confirm it. We currently provide phone numbers for the USA, UK, and Canada. If you are from another country, submit a request to add a phone number with your country code.
Never!
The responses are private and the phone numbers that your audience is voting from will not be transferred to anyone under any circumstance. The main reason we keep track of phone numbers is to identify the caller ID so that we can limit votes per polls as needed. That is the sole reason we capture phone numbers / Caller IDs. Your privacy and the privacy of your audience is of the utmost importance to us.
List of countries where your audience can vote via text
Our SMS Polling works in the United States, United Kingdom, and Canada. We are also adding support for other countries soon.
For international customers:
If you are running an event outside of these areas please contact us and we will check if assigning a local phone number to your account is possible.
Polling Results
You can download the polling reports.
The reports are exported in a CSV file that you can transform into Excel and analyze.
Learn about the analytics you can find about your polls, surveys, and open ended questions
You can see analytics for your questions by going to the polls list and clicking on one of the questions.
For each of the polls, you will see:
The breakdown of votes per option
The breakdown of votes per channel (sms, web)
The date and time of the creation
You can switch between the pie chart and column chart for the results. In the column chart, the results are shown in absolute numbers (find percentages in the pie chart)

Learn how to hide the poll results in the web widget
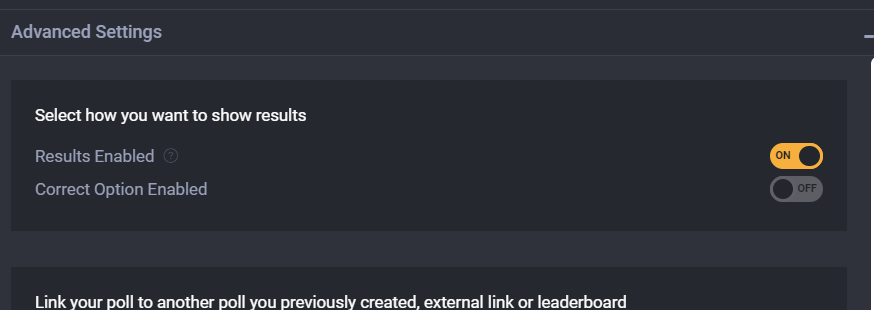
When setting up WEB voting for your poll you can choose to hide or show the results in the widget. By default, the results are shown right after placing a vote.
To do that, go to WEB settings and click “Advanced Options” either when creating your poll or when editing it.
In the “Results” section change the “Results Enabled” setting. It is set to “On” by default.
The exported data will be in a CSV format and will provide the following data:
Note: Depending on the anonymity status that you set up, your report will or will not have the phone numbers of those respondents who voted by SMS.
Multiple-choice polls
Response options to the question
How many SMS votes for each response option (absolute numbers)
How many WEB votes for each response option (absolute numbers)
How many overall votes for each response option
Percentage breakdown for each response option
If not anonymous, phone numbers for each SMS vote

2. Open-ended and Word Cloud questions
Question
Answers
Author (for SMS, it will be the phone number; for WEB, it will return the name “Web user”)
Date the message was received
State of the answer (Unread, Starred, Archived)
Source (SMS or Web)

After you launch your poll, you will see the Present button. Click on it and it will take you to the Presentation page that you will use to display your questions.

The best way to display the question and the results is to use the Presentation Mode.
Digital Joy has launched a PowerPoint Plugin that will help you easily add your polls to your slides.
Now you can easily add polls to your PowerPoint slides with the Digital Joy Add-in.
The plug-in works best with PowerPoint 2013+, 2016+, 2016 for Mac, and Online versions.
To get the Digital Joy PPT Add-in follow the next steps:
Go to your PowerPoint slides and create an empty slide that should contain the polls.
Access to the PowerPoint Store by clicking “Insert” on top Menu, choose “Add-ins” and click on “Get Add-ins”. Then type Digital Joy in the search field and hit Enter key.


Add the Digital Joy plug-in.
Log in to your Digital Joy account within your slide.
Choose the first poll to show and add it to your slide by pressing Add.
Switch between the polls without leaving your slide.
Show the voting instructions without leaving your slide.
If you need to do your polls with intervals, then add your polls to distinct slides.
Start and Stop your polls within your slides.
Alternatively, you can Start and Stop polls from a second device for a better experience.
There you have it!
PRO TIP:
Once you are done with polling, do the following to advance your slideshow. Use your cursor to click on the darker area above or below your slide while you are in the SlideShow mode. This will take you to the next slide.
If you have further questions, contact us through our live chat.
You can only zoom in with your browser. To zoom in this way, use your browser’s tools to increase the size of the page displayed.
Note: this does not guarantee proper display of the presentation page.
The presentation page has been optimized for display on projectors and large screens.
In most cases the content of the presentation page is large enough for the audience to be able to see it even in large rooms.
The Presentation Mode is a location inside your account designed to show the voting instructions and the poll results. The Presentation Mode also contains some presentation and poll controls, such as:
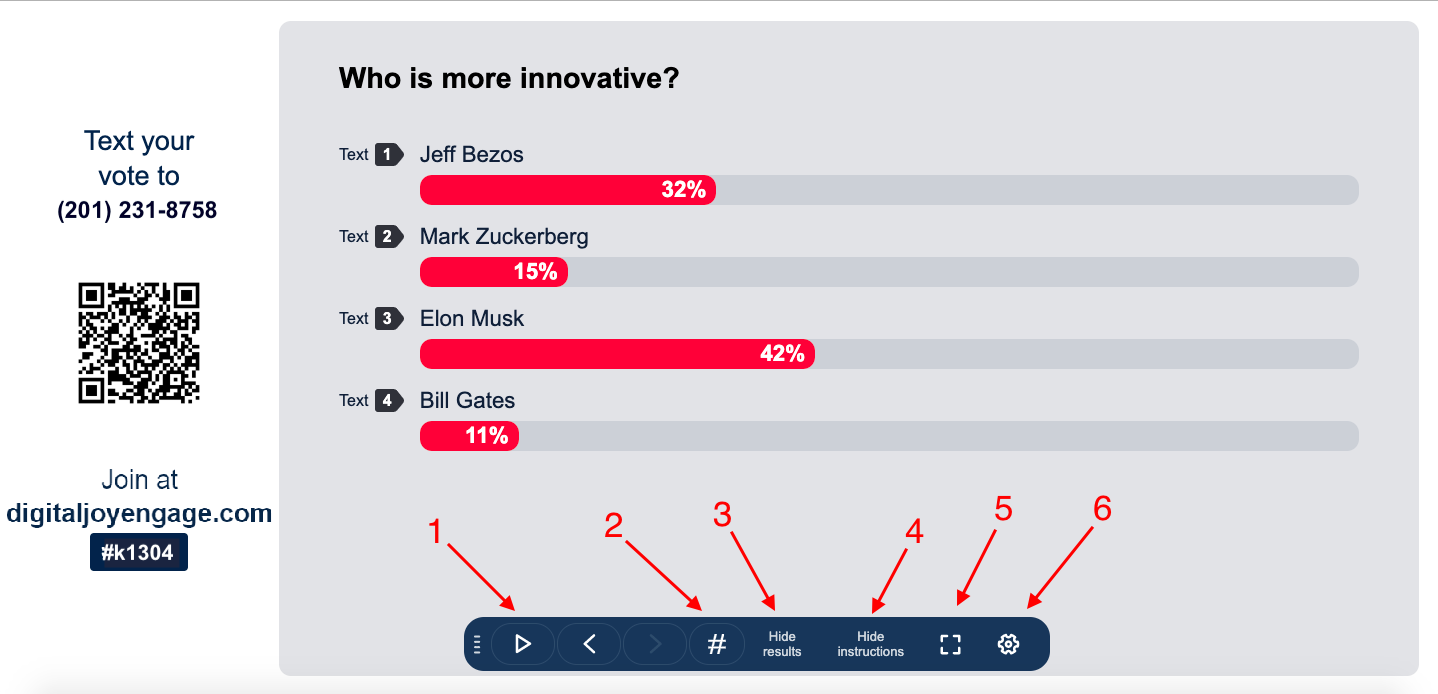
Question control and navigation – start / stop your poll, switch to other questions with “<“ and “>” buttons
Switch from absolute numbers and percentage breakdown view
Results – hide or show results
Instructions – hide or display detailed instructions on how to vote
Go full-screen (hides browser UI and lets the presentation mode cover the entire screen)
Sidebar – opens the sidebar with more useful tools
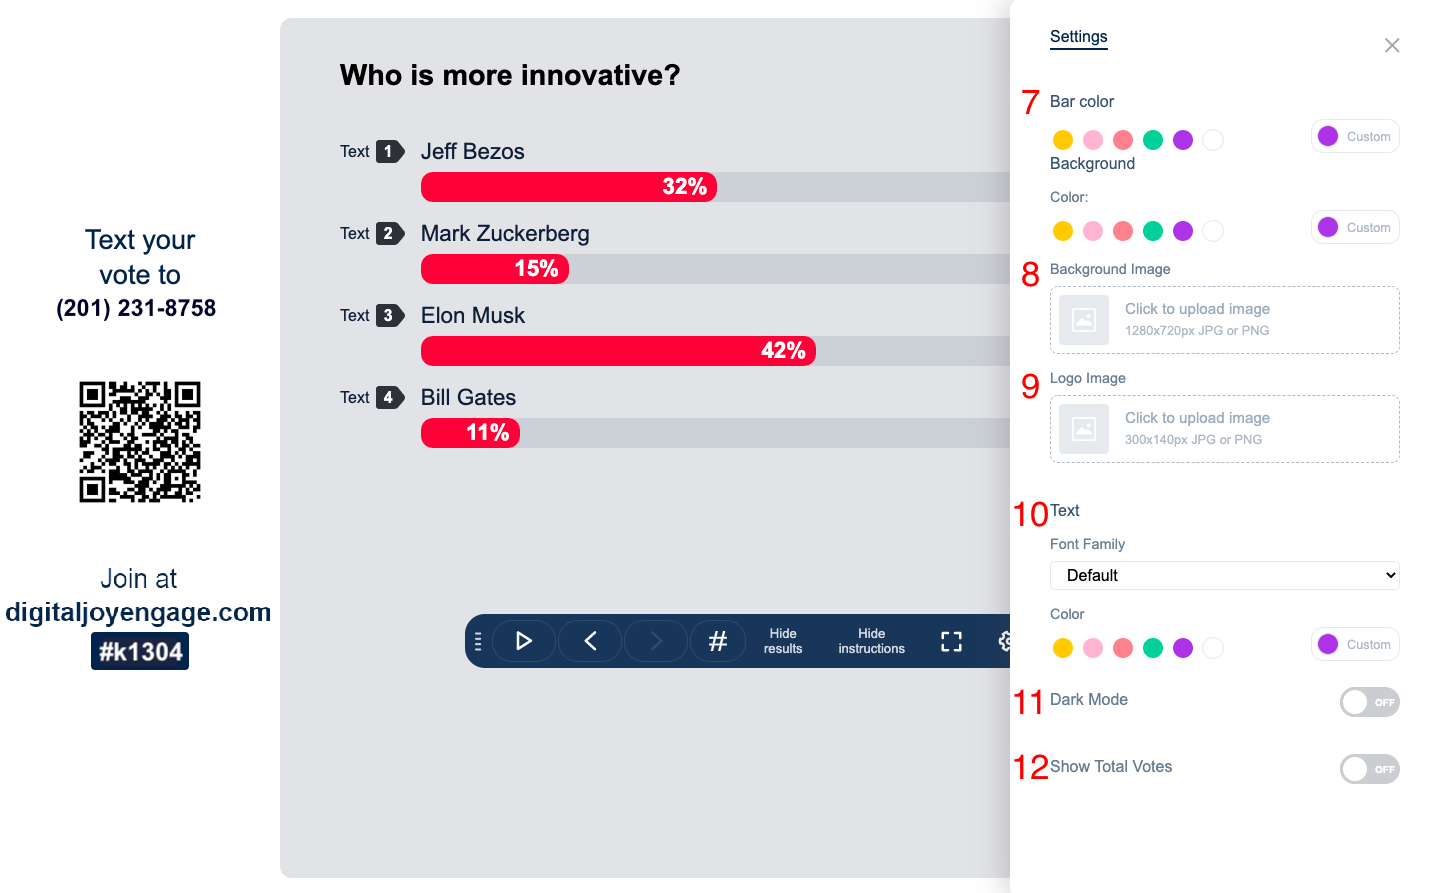
Bar and Background colors – select bar and background color
Upload background image
Upload Logo
Text – select font and font color
Dark mode switcher – enable or disable the dark mode depending on the lighting conditions of your venue / room (where the presentation takes place)
Show total votes
There is one Presentation Mode page for each of the polls you create.
If the URL of the Presentation Mode is accessed with a browser where you are not logged in to your account, the poll results won’t be shown.
You can also embed the Presentation Mode on your website or in a PowerPoint presentation.
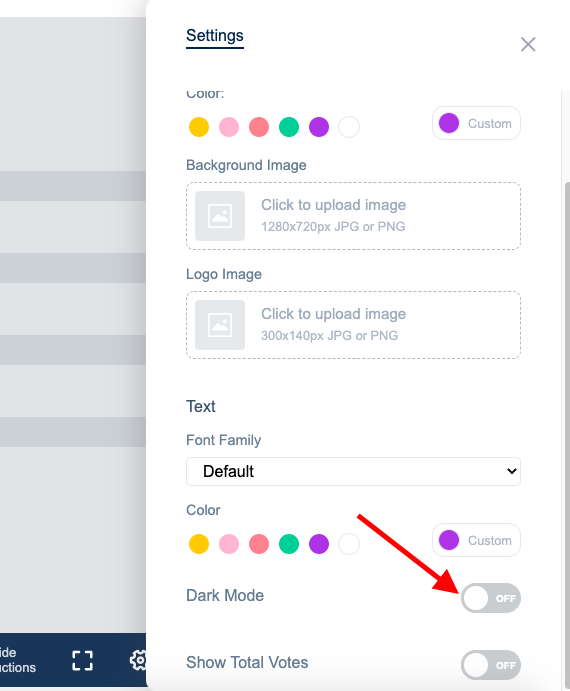
Learn how to switch between Light and Dark modes
You can switch between Light and Dark themes for your presentation page using the selector located in the sidebar.
To do that:
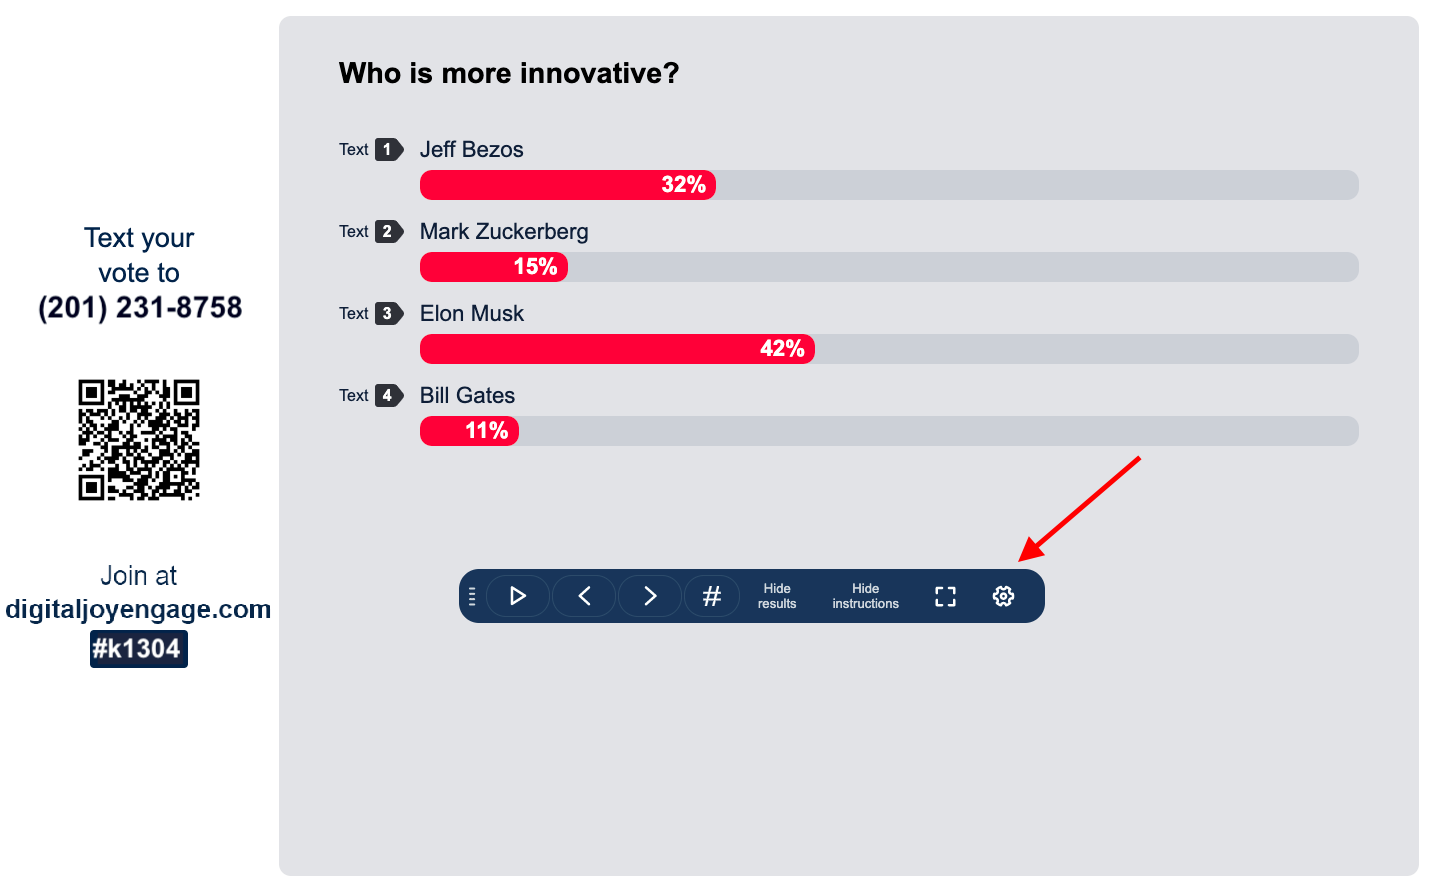
1. Open the sidebar by clicking the small gear icon in the bottom right corner
2. Change the theme by activating or disabling the “Dark Mode” switcher
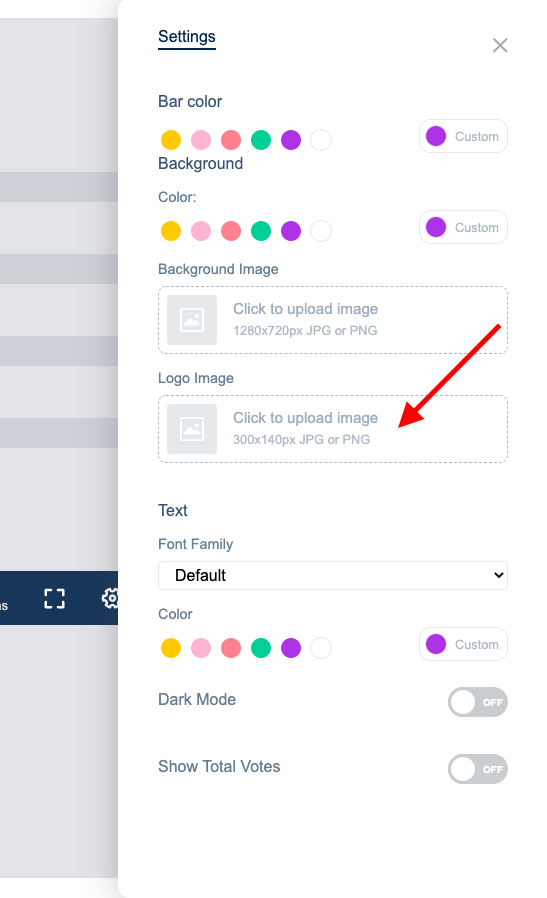
You can upload your own logo on the upper right corner of the Presentation page.
To do that:
1. Open the sidebar by clicking the small gear icon in the bottom right corner
2. Click the Logo Image box to upload an image.
To go full-screen on the Presentation Mode use the full-screen button at the bottom right corner
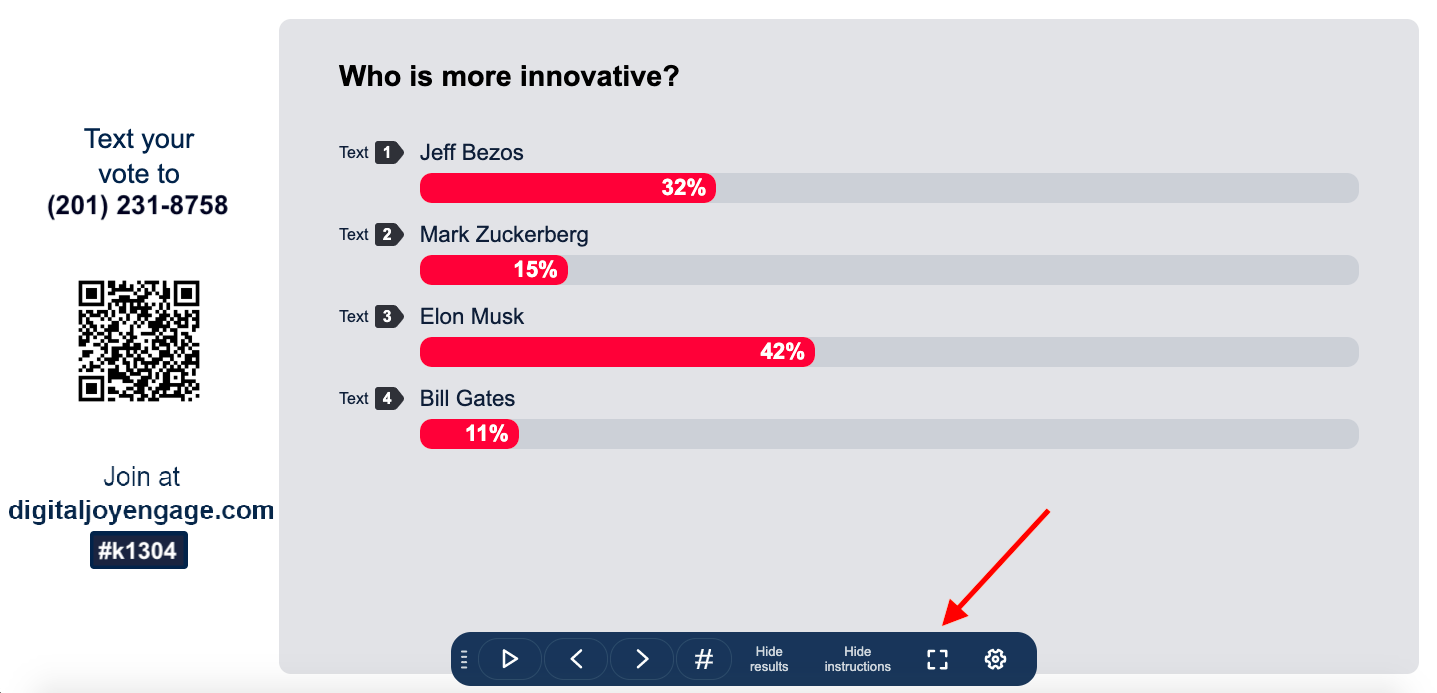
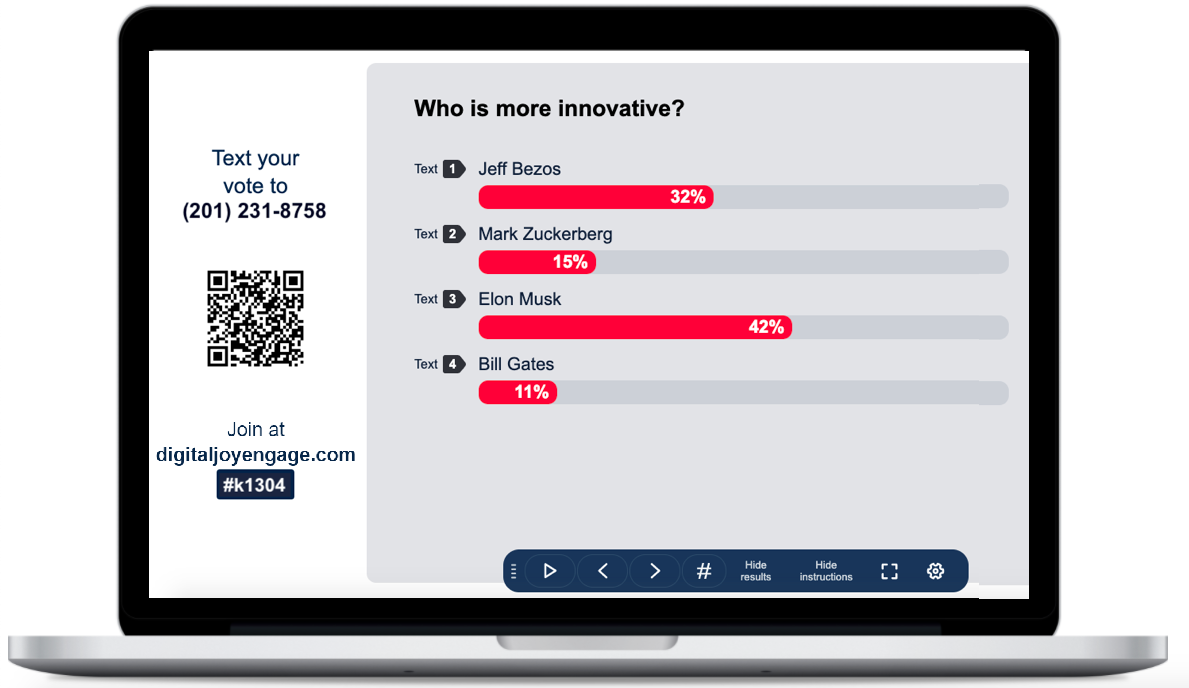
This is how a full-screen presentation will look on a computer’s screen:
I am using Keynote for my presentations and need to embed a poll in my slides
Currently Digital Joy does not offer Keynote integration.
We recognize that many customers are using Keynote for their presentations and will have this feature on our radar in the upcoming weeks. Please stay tuned for product updates.
Audience Q&A
Moderate questions by approving each one of them, identify popular ones by the number of upvotes they got, and block profane questions.
We are happy to introduce you to our new Audience Q&A feature that allows you to collect questions live as you are polling.
To find the Audience Q&A feature, go to your dashboard, and choose Audience Q&A on the left navbar.
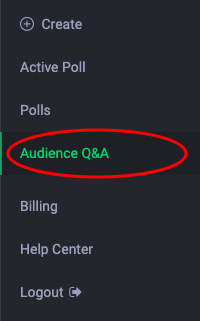

By default, Audience Q&A will be Enabled. To disable it, click on the corresponding red-colored button.
We introduced four new features as part of our Audience Q&A control panel:
Social Voting – this feature enables your audience to upvote questions submitted by their peers. This will help you understand which questions are the most popular.
Moderation – this feature allows you to approve questions before they go live. Aiming to keep your Q&A wall as clean and focused as possible, you can go through the questions one by one and approving selectively the questions that need to go live.
Profanity Filter – we have taken care of troublemakers in the audience. With a simple click, you will block incoming questions containing profane words for once and for all.
Anonymous – keep it fully anonymous and accept questions only anonymously. Give your audience the freedom to express themselves with candid questions.
Collect questions live while you are polling.
Yes! We have introduced a new feature – Audience Q&A, that allows you to collect questions parallel to running polls. You didn’t mishear, PARALLEL!
Let’s explore how to get it working.
You’ll see Audience Q&A on the left navbar of your dashboard.
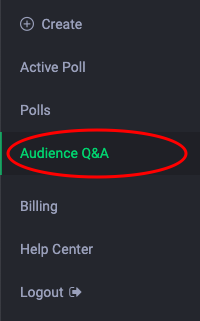
By default, this feature will be Enabled.

To submit a question, your audience needs to:
Go to digitaljoyengage.com
Enter your Event Code
If you have an active poll, then they will see a header with Polls and Q&A.
They would need to choose Q&A to submit a question.
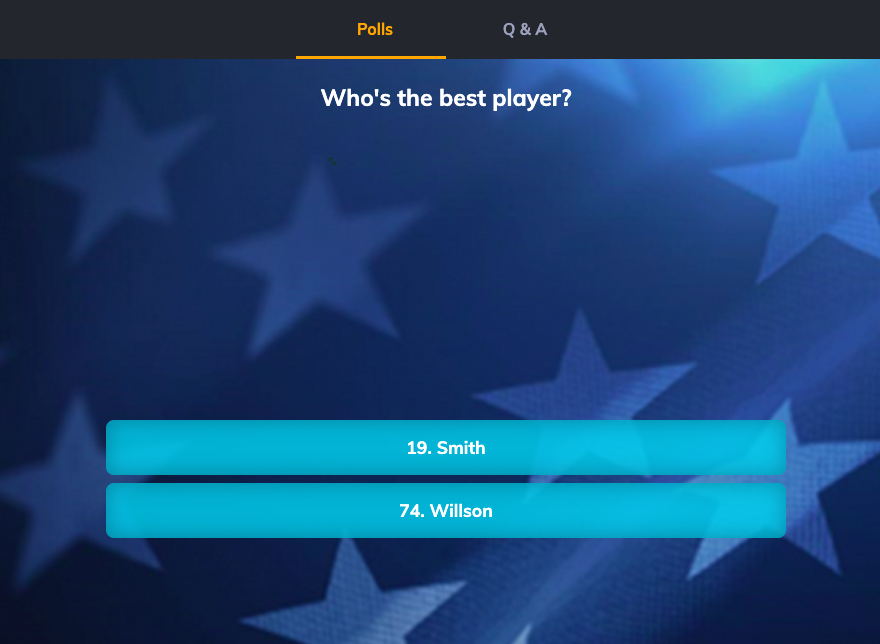
They can choose to disclose their name or keep it anonymous.
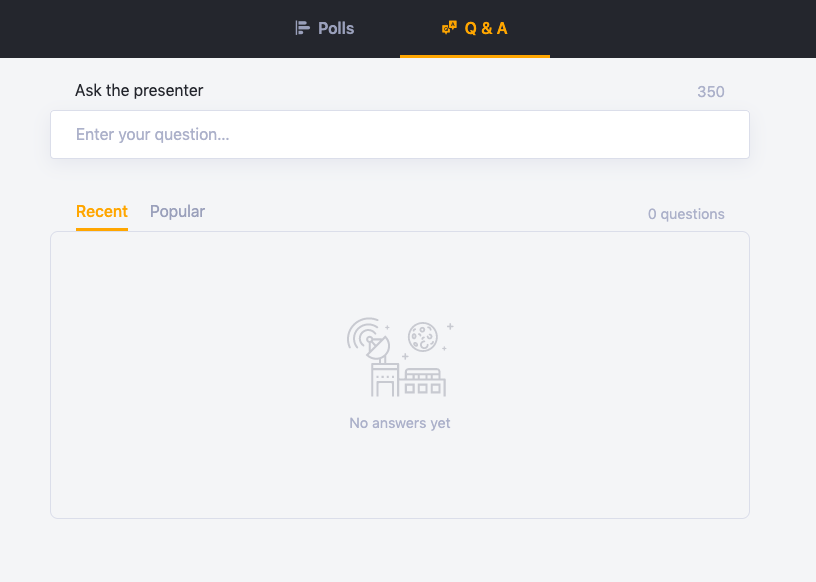
If there is no active poll, then you will see the Q&A page right away.
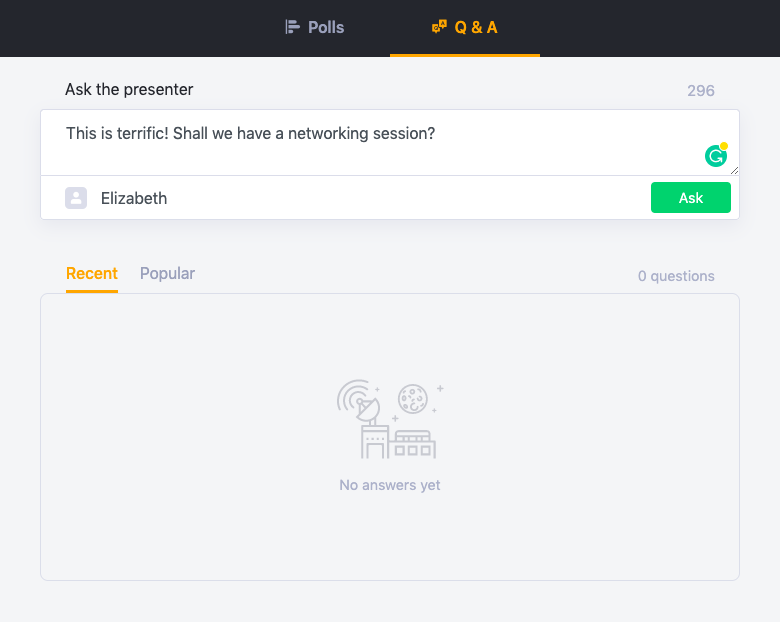
Note: Audience Q&A allows submitting questions only through web/online. If you want to collect questions by SMS, then use an open-ended type of question.
Identify the most popular questions.
Yes! This feature is now available for Audience Q&A.
To allow your audience to upvote others’ questions, you will need to enable the Social Upvote feature from your Audience Q&A dashboard.

This feature will show a “thumbs up” button next to each question on the Q&A page available to your audience. They will be able to upvote once per question excluding their personal submission.
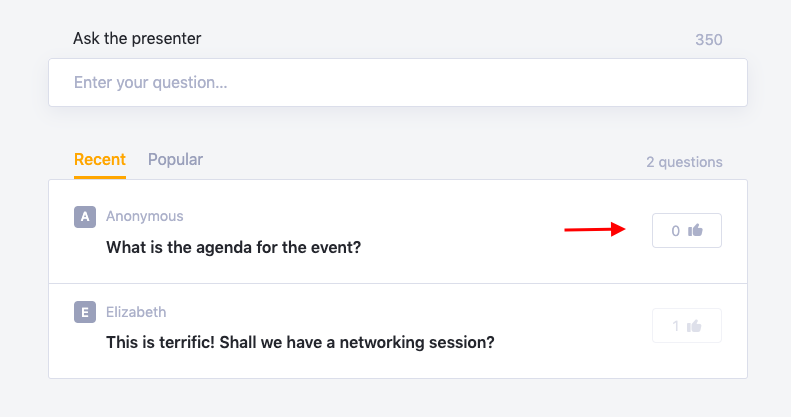
Learn more about how and where your audience needs to submit questions.
Starred questions are Feedback entries that have been manually Approved and therefore they appear in the “Approve” tab of the open-ended details page.

The Approve functionality helps presenters show only the feedback entries that are relevant, as opposed to showing all of the incoming entries in real-time.
Ensure transparency – collect questions and feedback anonymously.
Yes, you can collect feedback and questions anonymously by activating the Anonymous filter.

Obscure your questions without deleting them.
Archived questions are questions that have been received, addressed, and saved.
Archived questions appear in a separate tab on Open-ended, Word cloud, and Audience Q&A details pages.

When you archive a feedback entry, it will be hidden from all the display pages, but will be saved in your Archived section and will be available for a download.
Poll Groups
Poll Groups is a Digital Joy Engage feature that allows you to create polls with more than 1 question. These can be either a normal survey, or a fun quiz/contest/trivia where you can gather participants basic info (name, email) and list them in the leaderboard to show who is leading.
You can also attach website links with the poll questions so that your participants can learn more about the correct answers.
Learn to create more than a one-question quiz, survey, poll, or other using the Poll Groups feature.
To create an engagement using the Poll Groups feature, you must be on an Engage paid subscription plan. If you are on a free plan, you can click here to learn how to upgrade your plan.
If you are subscribed to a paid plan, follow the steps below to create a Poll Group:
- To enable the Poll Groups, go to the ‘Advanced Settings’ option on the left menu.
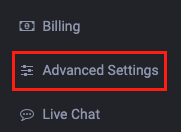
- Toggle on the ‘Enable Poll Groups’ option

- You will see the poll groups menu options on the left panel change from Polls to Poll Groups.
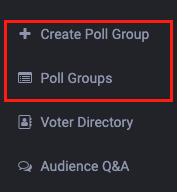
If you would like to create a single poll afterwards, toggle off the ‘Enable Poll Groups’ option.
Note: It can be either a poll or poll groups that can be run at one time - To start a new Poll Group click on the ‘Create New Poll Group’ button in the top right corner of the main dashboard.

- Next, enter the label & optional image for your Poll Group.

You can also upload an optional image* to your Poll Group by clicking the image button beside the label field. The uploaded image will appear on the left side of the Poll Group label field
- If there is sponsor for your poll groups, you can their message that will appear on the top part of the poll groups page.

- You can also accompany a clickable banner as part of the message by uploading an image and specifying the destination of the link
- Click the ‘+ Add Poll’ button to add a poll to the poll group

- You have the option to add either a multiple-choice poll or an open-ended poll.
- To add a multiple-choice poll, click on the Multiple Choice button.

- Fill in the Question field. Use the image button
 to upload an optional header image for the question.
- If your question has a description, fill in the description field

- Next, add the answer options for the poll. This can be answers for a quiz question, feedback options for a survey, or the name of a candidate for a poll.
Use the image button to upload an image* for the option. After the image is uploaded it will appear on the left side of the option
The image will appear in the poll page as followings: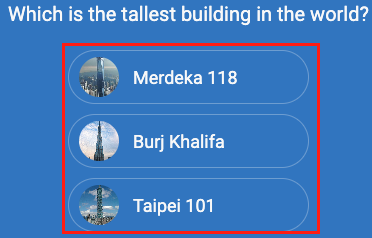
If the poll question has a correct answer, use the tick button to choose the answer that represents the correct one.
To add more options, click on the ‘Add Option’ button

- Fill in the Question field. Use the image button
- If you would like to add an open-ended question, click on the ‘Open-Ended’ button

- Repeat steps 6(b) & 6(b) to add your question & description.
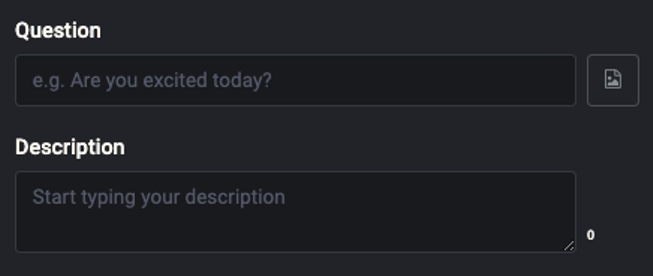
- You can optionally add a header image* with your poll. Using a header image allows people to understand visually about your poll question. Click the image button beside the poll question field to upload an image. It will appear on left side of the field once uploaded.

Your participant can then see the image above your poll question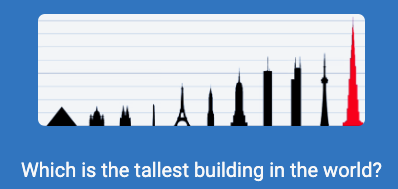
- If the question has a correct answer, fill in the options field.

- Repeat steps 6(b) & 6(b) to add your question & description.
- To make a question mandatory, toggle on the ‘Required’ switch

- To move the order of the question, click and hold the arrow button
 to drag the question to the required position.
 - To delete a question, click on the trash bin button

- Use the Advanced Settings button to customize your Poll Group.

- You can customize the…
- Background image of the Poll Groups page. This is useful for example you would like to add branding to the page
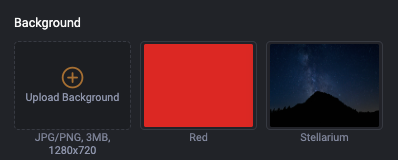
- Font family

- Text color
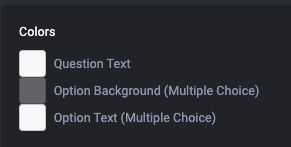
- Multiple choice options button corner style

- Other advance settings include the ones to be used if you want to create gamified quizzes or trivia where people can participate and score points. Click here to learn how to create this type of Poll Group.
- Click Done to save your settings

- Background image of the Poll Groups page. This is useful for example you would like to add branding to the page
- You can customize the…
- To save and launch your poll group immediately, click on the ‘Save & Launch button’

- If you would like to save only the poll group, click the upward arrow button and select the ‘Save’ option

- To exit the Poll Group edit page, click on the ‘Exit’ button.

*Image dimensions is not fixed and should be maximum of 10mb in file size
Yes you can! You can use the poll groups feature to create fun quizzes or trivias complete with leaderboards.
- First click here <Link to learn how to create poll group> to learn how to use the Poll Groups common features
- If you are creating a contest Poll Groups, ensure your questions have correct answer enabled for your questions
- Then go to the Poll Groups’ ‘Advanced Settings’ to enable the relevant contest settings:
- Show results – This option applies to any multiple choice question. After a participant votes, the percentage of the results will be displayed

- Group Answers – This option enables on the Answer Summary page button at the end of the poll group. Click here to learn how to attach an article link to an answer option

- Show correct answer – This option displays the correct answer information in the Answer Summary page:

- Show congrats page – This option displays/hides the congrats page at the end of a Poll Groups.

- Time Limit for voting – This option if you would like to set a limit for participant to answer a question within a specific time frame. You will need to enable the point and timing function to use this feature.
Click here to learn how more about this function.
- Group articles – This option displays the article links in the Answer Summary page

- Show results – This option applies to any multiple choice question. After a participant votes, the percentage of the results will be displayed
- Save your Poll Groups.
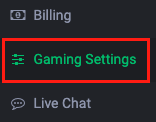
- To gather your participants details (e.g. name, email address) go to the Gaming settings and choose which authentication method to be used with your poll group. Click here to learn how to use the ‘Authentication’ feature
- If you would like to enable the leaderboard, go to the ‘Gaming Settings’ and toggle on the Leaderboard option

Yes you can. When creating/editing a poll group click on the ‘gear button’ beside the poll question to access the story link feature:

Toggle on the ‘Story Link’ switch
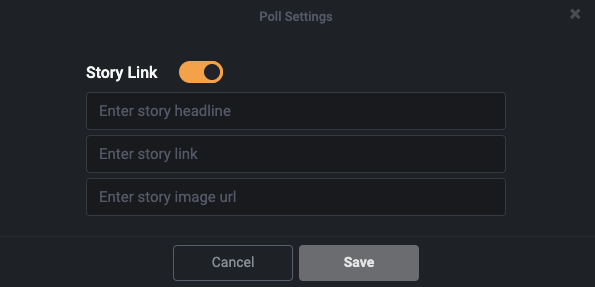
Then fill in the following fields
- Story headline text
- Story website link
- Image link (optional)
Click save. Go to the ‘Advanced Settings’ & toggle on the ‘Show Congrats Page, ‘Group Answers’ & ‘Group Articles’ options:

When a participant reaches the end of the poll and see the congrats page, he/she can click on the ‘Answer Summary’ button to see the results with the link
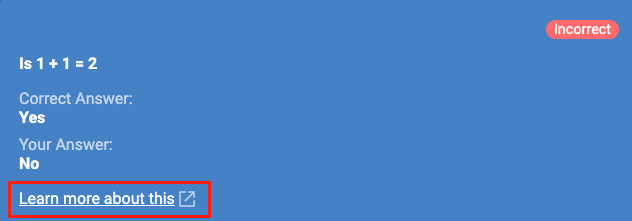
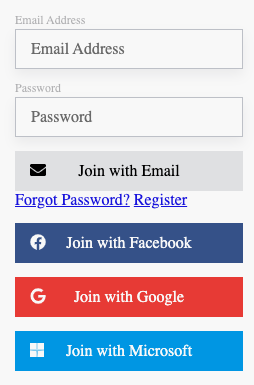
You can use either of the following to authenticate your Poll Groups participants.
- Microsoft
Go to the Gaming Setting left menu option and expand the Authentication option.

Toggle on which authentication type that you would like to use

After enabling the relevant authentication type, they will appear on the Poll Groups welcome page.
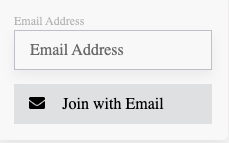
If you want to disable authentication, toggle on the password-free email option, which will disable the rest of the login types.
With Password-free entry turned On, participants only need to enter an email address to participate.
To add a brand logo to your authentication page, upload an image in the ‘Gaming Logo’ section.
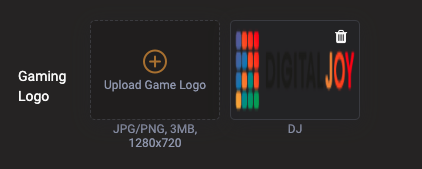
The uploaded image will appear on top of the login section of the Poll Groups welcome page when the participant is not logged in.
To share your poll group. click on the Poll Groups button to view the list.
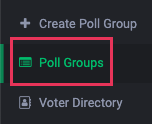
If your Poll Groups is not running, click on the All tab and find it in the list

Then click on Play button to run it
Next click on the Present button to open the Poll Groups page. 
Copy the page URL and forward it to your participants
The second way to share your Poll Group is using QR code.
On the Poll Group list page click on the vertical ellipsis button and then select ‘Download QR Code’
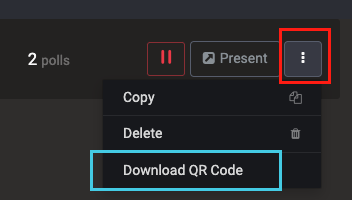
Then click on the ‘Download QR Code’ button.
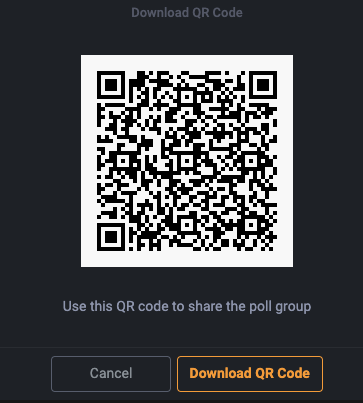
You can then share the QR code with your participants for them scan and go to your Poll Groups page
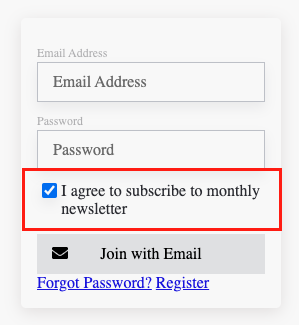
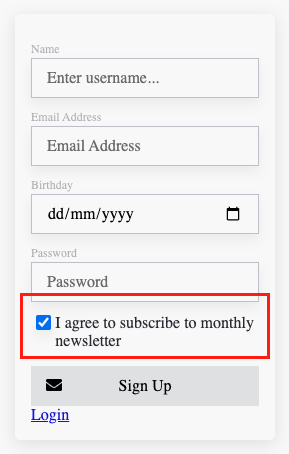
Whether you live in a region or country that mandates having an opt-in/opt-out for marketing or you want to give your audience the option, adding a checkbox is easy to do.
- Create or edit a Poll Group
- Click on Advance Settings at the bottom right of the screen

- Go to Opt-in checkbox option and toggle it on

- A textbox will appear below it. Fill in the message you would like your audience will see.

- Save the Poll Group & launch it. It will appear on both the login and registration page.
- Login page
- Registration page
- Login page
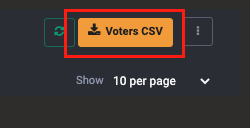
- To obtain the list of participants that opted-in by checking the checkbox, go to the Voter Directory page and click on the Voters CSV button to export the file.
- Fill in the email address to where the file is sent and click on Export.
If the list is long, it may take a while for the file to be sent to the destination email address.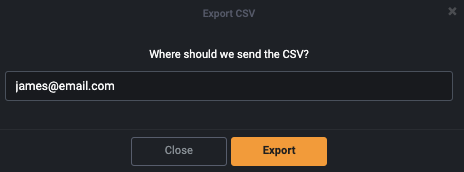
- When the email arrives, open the CSV file on a spreadsheet app (e.g Microsoft Excel). The opt-in data is under the Opt-In column.

Learn how to make a fun quiz or trivia with a leaderboard
You can create a quiz or trivia using the Poll Groups feature which is available on any of the Engage paid subscription plans.
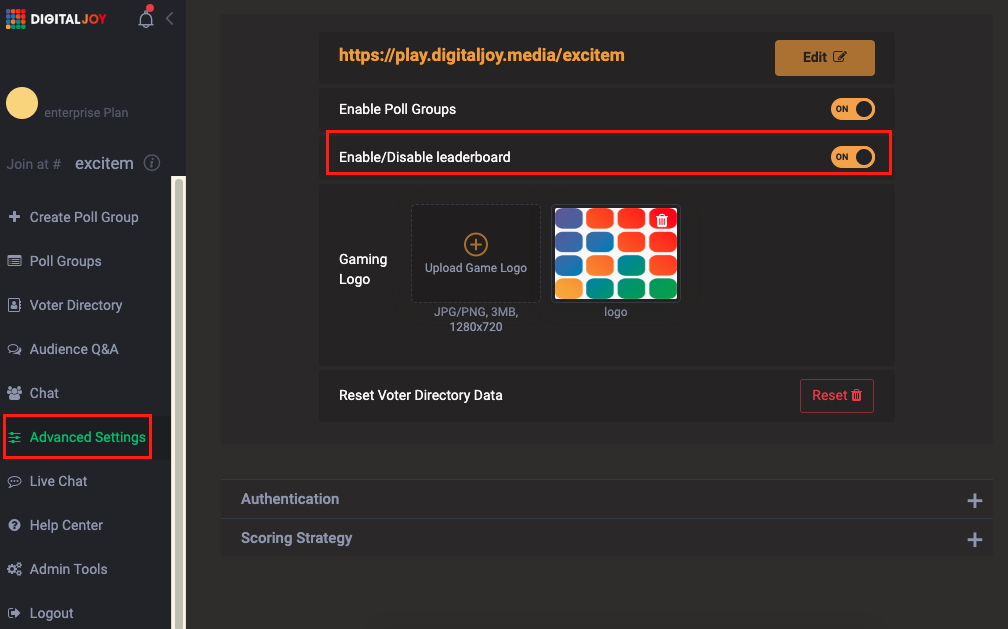
- To enable the leaderboard, go to Advanced Settings on the left menu. Then toggle on Enable/Disable leaderboard
- Next click on Scoring Strategy and choose which scoring method that you would like to use for your quiz
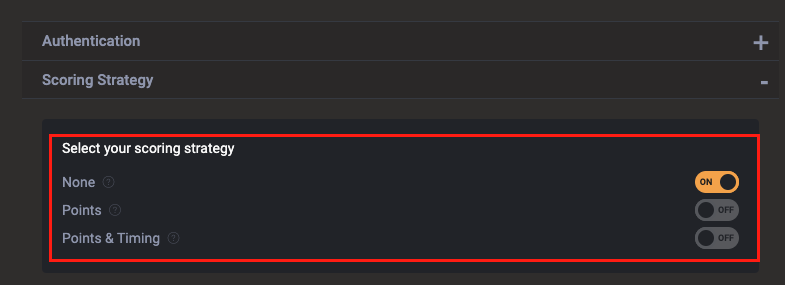
- None – no scoring method. This is usually being used for normal surveys.
- Points – Points awarded when correct answer is provided by a participant.
- Points & Timing – Points awarded for correct answer decreases as the time increases. You will need to specify how much time is given for a participant to answer a question in step xxxx.
E.g. Participant A who answered correctly in least amount of time gets more points than participant B who took longer to provide the right answer.
- Use the same steps when creating surveys to start with your quiz.
- Next for each of the question, specify they are mandatory or not by toggling Required switch on or off

- Then set the number of points to be awarded when a participant correctly answer a question

- If you would like to include a link for the participant to learn more about the question after finishing the quiz, press the gear icon next to the question
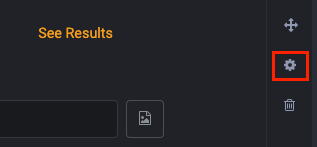
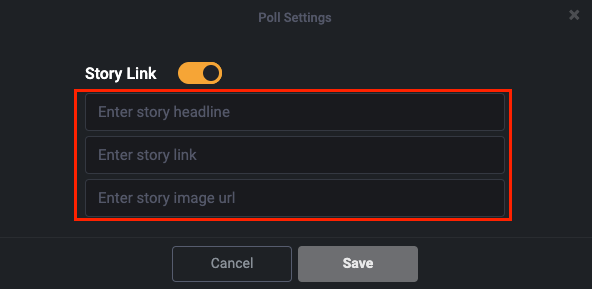
- Toggle on the Story Link switch

- Fill in the 3 fields below & then click on Save
- Story Headline
- Story Link
- Story image url
- Click to the Poll Groups’ Advanced Settings on the bottom left section of the screen
- Group answers. This toggle when enabled, summarizes all poll answers at the end of the engagement

- Show correct answer. This toggle when enabled, shows the correct answer after the user makes their vote.

- Show congrats page. When enabled, this toggle shows the congratulations page when the user completed answering all of the questions in the engagement.

- Group Articles. This toggle when enabled, summarizes all of the article links for each question at the end of the engagement.

- Time limit. This settings appear when Points & Timing scoring strategy is selected. Key in the time limit (in seconds) for a user to answer a question.

Digital Joy Chat
Digital Joy Chat is a real-time chat platform that can be embedded within your website and customized to match your brand. Digital Joy Chat’s scalable technology and powerful management tools support organizations of all sizes.
Digital Joy Chat offers several key features to help you reach more people, interact more effectively and engage your online community. With Digital Joy Chat, you can deliver real-time chat experiences that work across all devices and platforms.
Digital Enjoy Chat allows you to have 4000 concurrent members, friends, or fans in your online group chat rooms, and up to 10,000 messages per channel.
Digital Joy Chat can be embedded within your site or app or used on its own or alongside any streaming or published content to enhance engagement.
Digital Joy Chat makes it simple to embed live chat within your site or app. Once you enable Digital Joy Chat on your site, users can log in to the chat and immediately start interacting with you and other users.
Digital Joy Chat can be used on its own or alongside any streaming or published content to enhance engagement. For example, Digital Joy Chat is used alongside live video streams to create engaging live events. As an example, see: Digital Joy Events
The real-time social interaction Digital Joy Chat provides keeps users engaged and returning to your site more often, increasing stickiness and monetization opportunities.
Digital Joy Chat is available with Engage Pro and above plan. Please contact us for more info.
The chat admin dashboard consists of 2 panels. The one on the left is the menu panel, and the one on the right displays the settings corresponding to which menu item is selected
The chat admin dashboard consists of 2 panels.
- Left – Menu panel
- Right – Settings corresponding to which menu item is being selected

- Menu Panel
- Chat – Displays the chat admin dashboard page. From here you can:
- Billing – Displays the subscription billing page. Here you can view your subscription and choose which plan you would like to subscribe to.
- Live Chat – Click the ‘Live Chat’ option to contact our support team via a live chat window.
- Help Center – This opens our FAQ page if you would like to search information from our product knowledge base.
- Logout – This option logs user out from chat dashboard.
Learn how to create a channel in chat for interacting with many people at one time
A chat channel allows you to interact with a group of people at one time. You can use the chat channel for different purposes, such as discussing topics during a virtual event or online classroom community discussion.
After creating your account, use the following steps to create and install your first chat group channel.
- Go to the ‘Group Channel’ section on the dashboard

- Click on ‘Add Channel’

- Name the channel
- Choose or upload the avatar image for your channel
- Upload the banner for the channel
- Type in a description for your channel
- Click Create

- Your new chatroom channel will be listed on the ‘Group Channel’ list
- To edit the Channel, click on the Pencil icon beside the channel name

- To delete a channel, click Remove

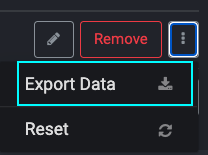
- To export the chatroom conversation history, click on the vertical ellipsis button and select Export Data
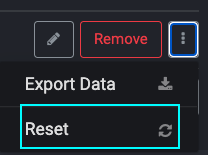
- To reset the channel conversation, click Reset
Customize your chat page theme to make it look more appealing
Absolutely! Your online chat groups can fit in seamlessly with the rest of the branding on your site or social media platforms. Engage Chat puts the admin in the driver’s seat: choose from multiple color settings, various themes, different fonts, and plenty of other new design features that ensure your online chat room is in line with your branding.
To do so, go to the dashboard->Settings section.
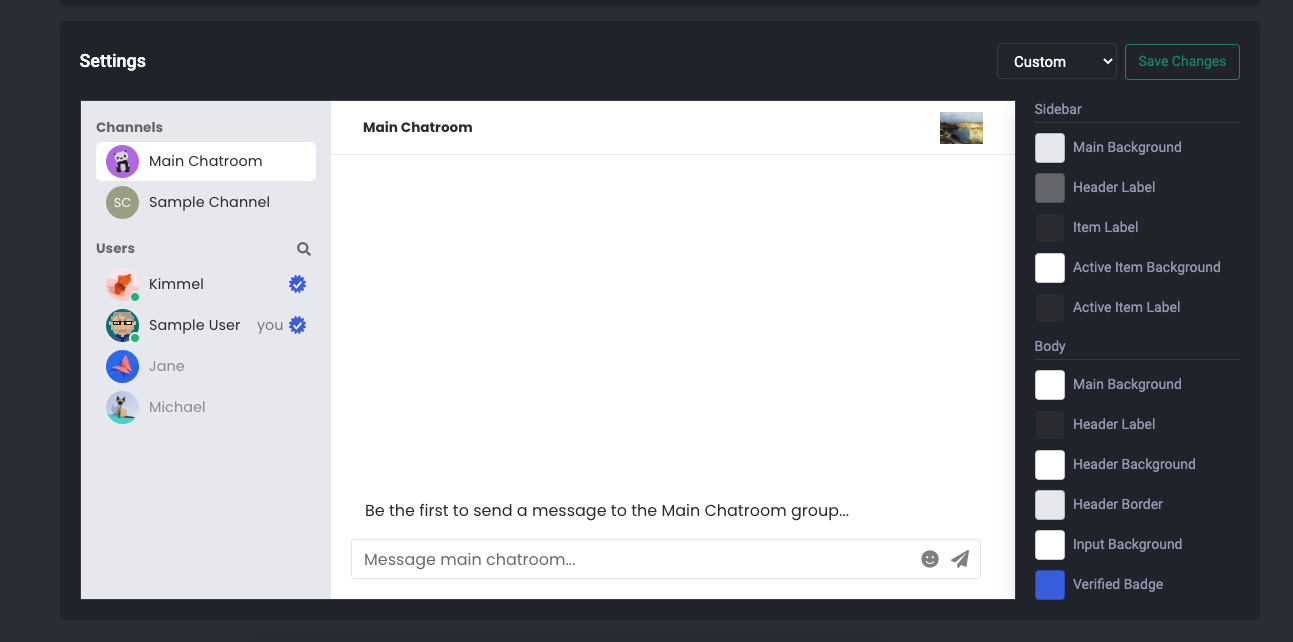
You have the option to use a pre-uploaded theme or customize your own
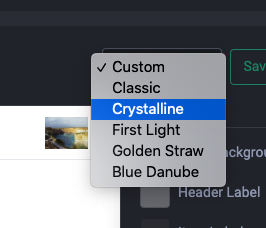
To create your own theme, select ‘Custom’
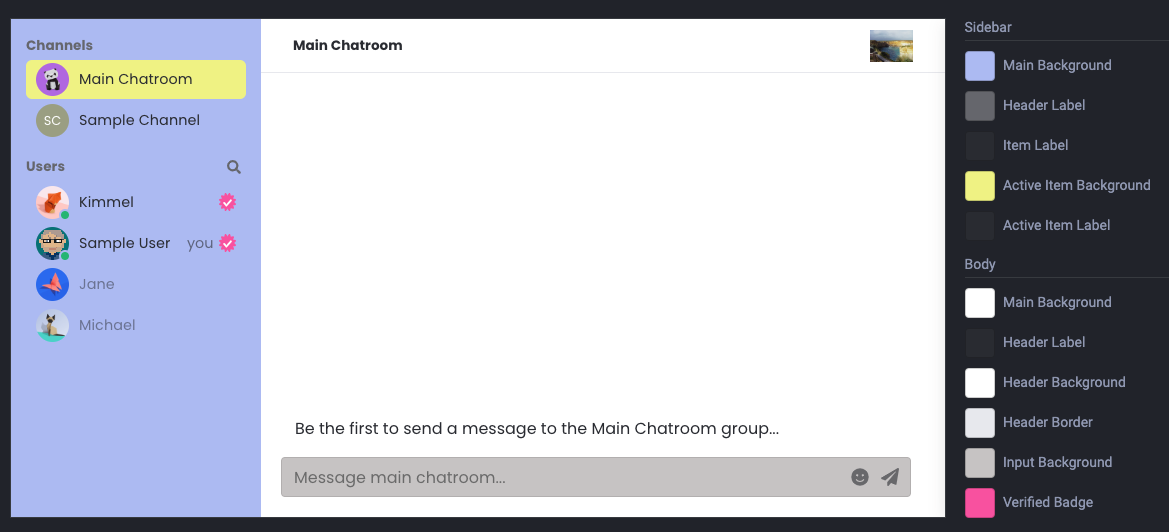
Then select which color you would like to use for each item for your chatroom by clicking on the color bar beside the item.
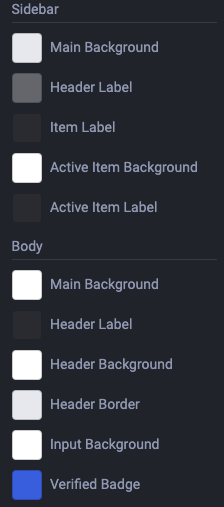
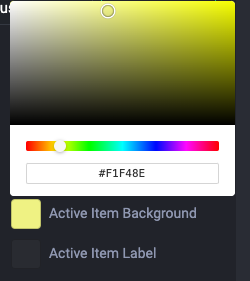
The selection will automatically be applied to the chatroom preview panel
Learn how to add and update your chat user’s profile
- To create a user, go to “Admin dashboard” -> “Users”

- Click on the “Add User” button

- Fill in the user information and choose an avatar for them. (They can change it later if they don’t like it. 😀)
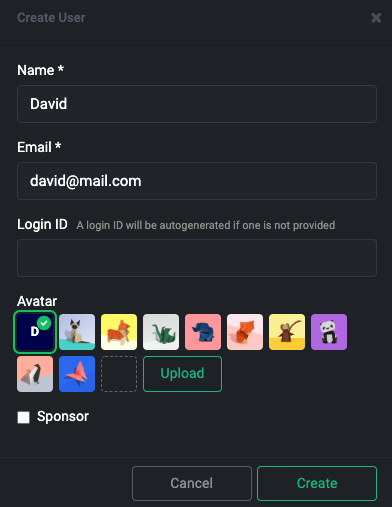
- If you want to identify the user as a host or sponsor, click on the “Sponsor” checkbox.

- A user identified as a sponsor will appear with a tick icon beside the user name in the chat to indicate to other participants who they are.

- Click “Create” to finish adding the user.

- To edit the user’s information, click on the “Pencil” button beside the user name.

- To delete a user, click on the “Remove” button.

- To provide a login link to a user so that person will not need to log in to the chat, click on the Link Chain icon.

Attach different image types directly within your group chat.
Yes, Digital Joy Chat allows you to send PNG/JPG/GIF image attachments directly within your group chat online. You can also include emojis and use plain text messaging.
Click here to learn how to attach images in group chats
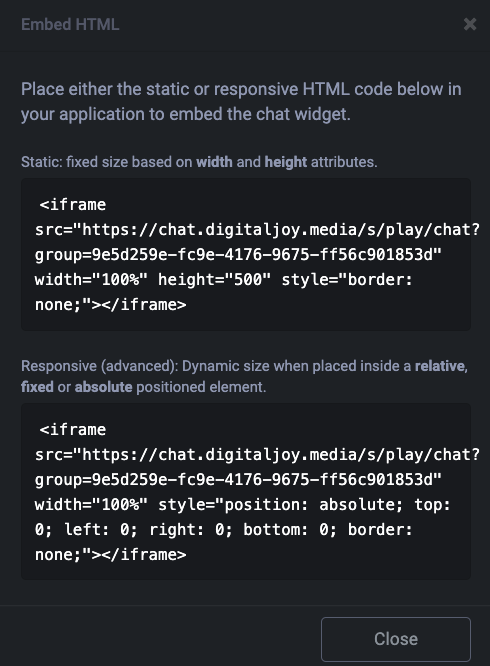
You can embed the Digital Joy Chat into a website. This allows visitors to stay on your website while they watch other content (e.g. Live Streaming Video) at the same time.
To embed Digital Joy Chat into a website click on the vertical ellipsis button on the top right corner of the Digital Joy Chat dashboard page and select Embed HTML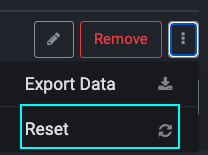
Choose & copy either the static or responsive HTML code from the Embed HTML pop-up window
Make your chat private so that only invited guests can join
To make your chatroom private, you must pre-register your participants and assign them a Login ID.
- Go to the Admin dashboard->Users section and then click the Add User button

- Fill in the user particulars, especially the Login ID.
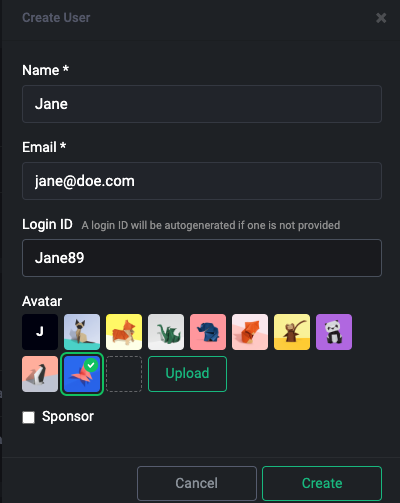
- Click Create
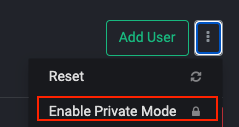
After creating the users, enable the Private mode by going to the admin dashboard, clicking on the vertical ellipsis button beside ‘Add User,’ and selecting ‘Enable Private Mode.’
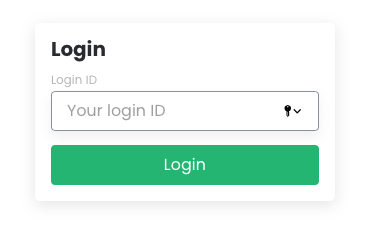
Once Private Mode is enabled, only a pre-registered user created by the admin can log in with their assigned Login ID.
Learn how to launch your chat page and share it with the other people
- To view your chat page, click on the ‘Open Chat’ button on the top right of the dashboard to open the chat in a new tab

- Copy the chat address and share it with your participants for them to join your chat

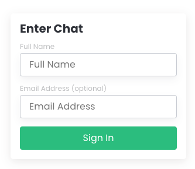
- By default, your chat participants will need to sign into the chat by entering their full name and email address on the login page
- If you want a private chat, you can pre-register your attendees and assign a username for them to log in. Please refer to this link on how to do this.
- Once they log in, the participants will be listed on the chat page, and they can start to chat with other participants.
- They are also listed on the ‘Users’ section in the chat admin dashboard.
The Digital Joy Chat page consists of 2 sections.
The Digital Joy chat page consists of 2 sections, the Main Chatroom and the Chat Panel.
Main Chatroom
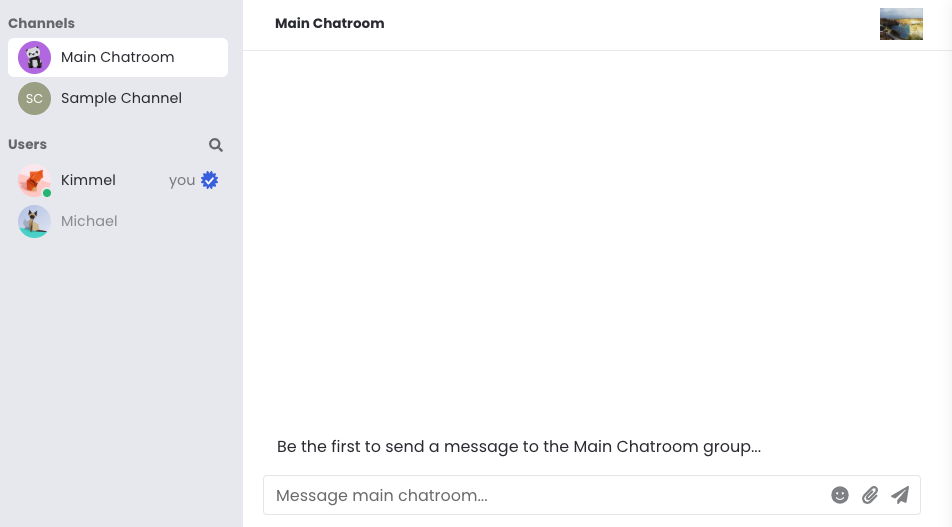
The main chatroom lets you see what chat channel is available for group discussion. It also shows who the people that you can chat with either on the chat channel or directly are.
- On the left, there are the chatroom channels and the user list
- On the right is the chat conversation panel. This is where user can view and interact with other users
- To view and participate in any of the chatroom conversations, click on any channel on the Channels list
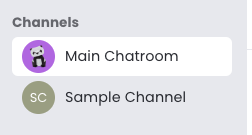
- To start a private conversation with another participant, click the person’s name in the Users list and start chatting with the person
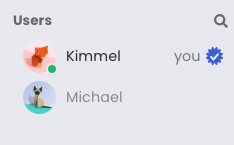
- Use the magnifying glass
 icon to search for a specific name in the Users list
Chat panel
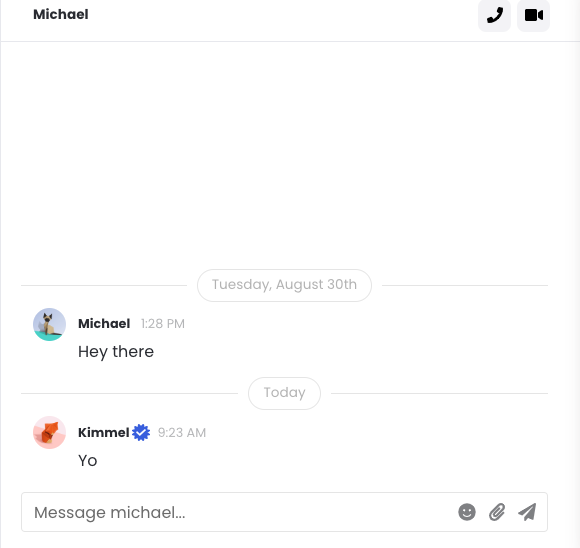
The chat panel allows you to send messages to others within a chat channel and through direct messaging.
- It consists of the conversation history and the chat field.
- You can chat with the other person or people by typing your message into this field.

- To send your message, hit the ‘Enter’ key or click on the paper airplane icon.

- To attach an image with your message, click the paper clip icon

- To insert an emoji, click on the emoji icon

- You can react to the message by hovering over it and selecting which reaction to .use

- Click on the chat cloud icon to reply to a specific message as a separate thread.

- To start a video chat with a user, click on the camera
 icon on the chat panel’s top right.
 - For audio chat only, click on the phone icon.

Digital Joy Chat gives the admin a number of different ways to control and moderate their Chat.
Pin a Message to the Top of the Channel
The admin user can choose to pin a message to the top of the channel by hovering on a message and clicking on the Pin icon.

Some examples of how this functionality can be used are:
- Inform participants of a Live Stream or conversation that is starting soon
- Bring an important question and/or answer to the top of the chat for others to see
- Highlight a message from a sponsor, ie. special code for 10% off, etc.
Delete Message from a Conversation
The admin also can delete message from conversations by clicking on the Thrash Bin button

Some examples of how this functionality can be used are:
- Removing unwanted information or comments from the thread that are disruptive
- Removing incorrect information from the thread